I decided I wanted an always-on display in my room that tells me the weather so I can just glance at it and know to grab my coat or if it's okay to let my cat out or when I should let her out. I talked to my instructor, Doug, about this and he told me that he wanted me to create a proposal / plan, which I will go over with him before I start the project. This has various benefits, including avoiding scope creep, which is a major problem when doing projects.
To explain scope creep, basically you get an idea for a project you want to do, and say you're doing this just for yourself, it's not official and all that so you just plunge forward and try to figure out how to do this. And you might have to go for a while before you figure out how you're going to do it, you might initially guess that it won't cost more than X amount, and you're fine with that, but as you do the project, or try to, you get caught up in other things, maybe you don't feel like tackling a certain problem just then, you put it off, all sorts of things happen. And then you finally start getting the parts and / or tools you need for the project, it turns out it costs more than you initially thought. And it's taking longer than you thought it would. And then before you finish, you suddenly decide that you want this or that feature added and you think well, it's only going to add another few weeks to the plan, just for it to take another month or so. And then before you know it, you have scope creep.
Scope creep is a thing that companies want to eliminate, cost overruns, time overruns, all sort of things. And so they have the project manager or whoever create a proposal. This states what the project is, what it's benefits are, how long it is estimated to take, how much will it cost, and this plan or proposal has to be followed carefully because if there are any changes like you get halfway through it and realize, well, we need this feature, the higher-ups can then decide by looking over the revised plan, if they want to go through with it. The initial plan or proposal also lets them decide if they want to even bother with this project in the first place. Do we want to spend X amount of dollars, have our guys spend X amount of time doing this instead of other things that are needed, do we really need or want this benefit?
So I am creating a proposal...or plan. Even Doug forgot what it's called, lol. I'm sitting here thinking he does these all the time because he works like three other IT jobs while teaching at MTEC. But I forgot what he called this and I barged in on the middle of his lesson to a few newer Fundamentals students so I could ask what he called it and he sat there for like thirty seconds tripping over what I was asking him. He mumbled and fumbled for a bit and said like five different words that didn't sound right, then he said plan, and then proposal and said, "Proposal, I like that one, let's go with that one!"
THE BASIC IDEA
-To have a device with a small always-on screen so I can have the weather displayed at all times so I can know if it is raining / snowing, is it too cold to go without a coat or to let my cat outside. I want this and have a desire for it other than just learning. I want to either get a raspberry Pi 4 because there's cool open frame Pi tower case I want for it to put this on. Alternatively it might be able to fit snugly on my Ubuntu File Server and I can somehow attach a display to it that's just for displaying weather data.
I want to learn with this, however, it needs to be simple enough to complete within a reasonable period of time, no month after month unable to progress situations.
WANTS / NEEDS
-It needs to be reasonably low power, this includes the screen but I am not currently decided on the size of screen, whether it has color or not, or graphics or anything like that.
-The cost needs to be front loaded and back-end free.
-Having a small device on my computer cabinet the size of a Pi that plugs in via ethernet is fine.
-I don't mind having options, graphics, I don't mind if the device is fancy.
-I want to use this to know if I need my coat or if its snowing or raining or if its too cold for my cat.
-I do want the screen to display temperature constantly and basic weather like "windy" in one word, or "snow" or "rain". It can be more than one word but the point is that it doesn't have to be super detailed but detail is fine is possible and easy to read / implement.
DO NOT WANT:
-No continually paying for services monthly to keep it working, any resources it uses that are provided by other services need to be free of cost. Including the API's I will use.
-I don't want this to take multiple months to accomplish or require long recesses.
-I want to learn in the process but I don't want to have to learn all of how to program in Python in order to do this. I want to learn but within reason.
-Do not want to set up a weathervane on my roof or sensors outside my window if I can more simply just get what I want from the internet for free.
-I don't want to have to press a bunch of buttons or turn things on or off to get the information i want, I want to be able to glance at this screen while getting ready as I run out the door--just so I know if I need my coat every morning.
-
THE GOAL
-Looks like a screen with a little device attached to the back that runs the project. Ideally there'd be a case for the Pi and the screen, and I can just plug this in to ethernet and power, or plug in a USB wifi dongle and power.
THE PLAN
I Looked up projects on GitHub where others had done the same thing and basically did all the work for me. This is important because I want to learn but not actually reinvent the wheel. The confidence in my ability to do stuff like this without someone standing over me making sure it went well while getting something cool I want to make my life easier is what's desired here.
2024-03
Okay, I don't know if that actually resolves the issue with the...plan? Proposal? Whatever. If my instructor is going to give me this assignment it should probably not be beyond him what exactly it's called or how to do it. I really did assume that because he works multiple IT jobs that surely, he knows all about this and has done it countless times. Nope! I strangely have this idea that he is more proactive than his typical co-worker that doesn't challenge themselves much and now I am learning that this just isn't a thing where he has worked. And he'll read this, laugh, and then turn to me and say "Okay, blaw blaw blaw excuse excuse excuse" and then I will pretend to rewrite this section.
It's fine, he can only get me kicked out of the program, no big deal!
So, I looked through GitHub weather station projects others had done and pasted. This one guy posted something that looked really cool and I started to drool, and then realized I was scope creeping already and I haven't even finished writing the proposal yet by this point. But I reigned it back and thought, no I don't need that, then found this other guy that seemed to pretty much do exactly what I wanted already. And it was better because the screen was an E-ink display. So when I turn the lights off, this thing won't be lighting my room. All of my other strip lights and stuff will take care of that. Basically, the lights are always on in my room, just to varying degrees of dimming. Darkness? Where we're going, we don't need darkness!
Okay, so I was going through this guys parts list and found the E-ink display he was going to use and I thought it was really cool, it was even like seven and a half inches. I was like, perfect, not too small! And then I went on Amazon to see if I could find it and it turned out that Amazon doesn't carry it. This thing is made internationally, I would have to buy it from Europe and convert to Pounds and all that. Nope, I am sure Amazon has something more local that will work fine. I found something that was almost the same and used an SPI connector, looks like what a Pi would use, usually to connect cameras. Doug and I both looked at it and I was willing to take the chance and buy it to see if it worked. He said yeah, that's the only way to know. I got it in the mail today.
I was also thinking a few weeks ago, I should get a Pi, and I had a Pi Zero 2W, which is what my initial Pi Hole installation was on and it worked great except for bandwidth when I got my file server going. After this, I saw no reason to keep it so when new Fundamentals students came in like three months ago or whatever, they were all like, you know how to build a Pi Hole? Wo! ...What is a Pi Hole anyway? So we decided for project day one Thursday, and since I was SCRUM Master that month, which meant I had to hold their hands and make sure they did projects and stayed busy, I guess I will reluctantly stop what I'm doing and help them and make a Pi Hole. But Chey felt he could afford to buy his own Pi and Jayden had no money. Chey wasn't sure if he would have a Pi by the next Thursday when we were slated to do this, so I asked them if either of them wanted my Zero 2W and Chey said he could get his own and Jayden was like, yeah okay, I'll take it. So I brought in all the stuff I had for it and gave it to him.
Fast forward a few months, he never finished the project because he never did the port passthrough on his router until the last time I saw him a few weeks ago, when he withdrew himself from the program because he was having a tough time outside of class. And only a month ago did I discover that I would have liked to have simply been able to use my Pi Zero for this project. I just started paying for a trainer, which is expensive, and that took up most of my play money so if there was some way to not have to pay the $22 to purchase, pay tax and ship the device over a few weeks, and then another $10 for the same case I bought the first time, and any other parts I would want to buy besides the screen, I was sort of not looking forward to this. My other purchasing needs have increased since I lost so much of my purchasing power.
But then the security guard, the one all the girls are all up in his business the whole time he's clocked in, seriously I don't think he's a hot looking dude, what do these girls see in him? Anyway, hey Owen, just forget the last sentence exists, you are surely a stud...apparently. Well, you get more action than I do anyway. Helps if you talk to 'em occasionally.
Yeah so anyway, he came in a few weeks ago with a couple of tackleboxes with all these little boxes full of electronics, Pi's, bread boards, wires, chips, sensors, little tiny screens for things like Pi's. And everything had a little box that it fit neatly into that was repurposed for that thing. He said he had a few Pi Zeros and I suddenly went wide eyed. Oh? Yeah, I have a Zero 2W and a Zero 1, not a W, meaning there's no WiFi. He said he didn't want the second one so if I bought it from him, he'd give me a real good price. We looked up the price and I think they were selling somewhere in the teens, so he was like well, six dollars? I was like, yes please! Hey Doug this can do my weather project right? Yeah. So now I have the Pi and the screen. Just need to figure out the case for the screen and the Pi too if I can help it. I keep thinking about this one project I saw online once where someone cut out an Altoids container and attached a Zero to the inside. And I keep thinking, I wonder if there are any tins like that but that can hold a Pi and a seven and a half inch screen.
So update, I bought a paper white screen for one such project I had found online with instructions that does exactly what I want. I also bought a case that came with all sorts of adapters, a power switch, HDMI to mini or micro HDMI, and a USB micro to full size adapter. These became indispensable in order for me to get any work done on my project today, now April 18th.
I got stumped because yesterday I was looking at the instructions and thinking fondly of starting the project and the first thing he said was to do SUDO RASPI-CONFIG". But he seemed to skip like twenty steps, he said absolutely nothing about installing an OS. So wait, what OS do I install. I looked and looked and couldn't find anything. I came up with a potential solution to just go ahead and install Raspbian which is now called Raspberry Pi OS or something like that because this project is after all, on a Raspberry Pi device. I think it's a fair assumption. But if I went through all the trouble to get this going just to find out I have to start all over and flash it with another OS like Ubuntu or something, I would be really frustrated.
Doug wasn't in yesterday so I couldn't ask him what the deal was. I came in today and told him my idea but he was too busy to comment while working with another student and I suddenly had an idea. I could good what OS that SUDO RASPI-CONFIG command works with and it is probably only going to be Raspbian. It says RASPI in the command. I googled it, I was right.
Moving on, I grabbed a USB card reader and a new micro SD card, loaded up Pi Imager and entered the hostname, username, I made them the same just to eliminate any confusion, password, an SSD, I discovered around this point that I have made a grave error in judgement when buying the parts. I can't do anything till I buy a micro USB hub with an ethernet port on it. I gave the one I bought for my other Pi Zero 2W to another student so he could make a Pi Hole because I was so sure I wouldn't do anything with the Pi. I had upgraded to a full blown desktop with way more power that I could install numerous things on. What could I possibly need the 2W for? Well...huh! And I gave him all the stuff that went with the Pi, including the micro USB hub with ethernet.
So now since I don't have one, I need one and don't have it. And I looked at my balance and discovered I had to be careful, it was not within my budget to then buy it right now. I thought, well, I can install the OS, there are adapters so I can connect a screen and a keyboard since those are the only available ports, the non-power USB and the HDMI port on the Zero 1 I am now using.
Doug provided me with a WiFi dongle and so I grabbed that micro USB to full size USB adapter from the pi case kit I just bought, and used that adapter so I would have WiFi. I had entered the network SSID and password, its a hidden network so I selected the hidden SSID option. And then Doug told me five minutes later that by the way, that WiFi dongle is 2.4 GHz only, so I can't connect it to the network I was going to connect it to because that wireless access point doesn't transmit over 2.4, only 5.0, so I needed to switch the imager settings being flashed to include this other WiFi SSID and password that connect to the same router but do use 2.4 GHz. So I reimaged it to include the other WiFi network instead.
I imaged it, I connected it, I was expecting to SSH in, so I had selected for SSH to be enabled, I plugged it in and inserted the card and powered it on. The green light flashed a few times and then stayed on. I went into the router settings in class and checked the WiFi connections for the router that the alternative WiFi network we were using only had about four devices connected to it. One was an IP camera, another was named something definitely not my Pi, and then there were two question marked network names. And in the DHCP listing of all network devices, there were four devices with question marks. I tried SSH-ing into all four of them with my hostname I had given it in the imager and two of them were refused, and one of them didn't respond to requests twice.
The keyboard lights were not coming on during this process, so I was wondering about that too.
Doug found a USB hub I could plug into the micro USB to type A adapter plugged into the pi, so now we had WiFi, keyboard, and power and screen, I used the HDMI micro to full size adapter and plugged a screen in. It went into a boot loop. Doug was concerned that we were taxing the pi for too much power when using my 1 amp 5 volt power brick for old iPhones. He switched it out for a 2.5 amp brick. That didn't change anything. He also unplugged all USB devices and it still boot looped. I had inadvertently installed the maximized, or full sized version of Raspbian, with the desktop environment that was a couple gigabytes. I reimaged for the lite or minimized version with just the command line interface. That didn't work. Still boot looped. Doug tried various solutions, plugging and unplugging various things to see what it was, and then in case there was something wrong with how I was imaging the card, he tried imaging it on his computer, and finally after twenty minutes he said that he wasn't going to jump right to hardware failure, although, it isn't looking good. It is probably hardware failure. So I would have to buy another Pi and this time, a Zero 2W, and a dongle with extra USB ports and an ethernet port as well, like last time. I don't know what else this could be though, if not hardware failure. He then grabbed the card so he could try a different kind of image.
I asked Doug what all the reasons were that a Pi would boot loop and the only thing he said was "power issues".
Okay, it finally booted successfully.
The mini HDMI to HDMI adapter was interfering with the ability to detect the monitor, so it turned off HDMI output as soon as the computer booted fully. To fix this, we had to edit the config.txt file that could be found in the root of the boot partition (I did this using File explorer and browsing into the SD card after imaging it). I added (or uncommented) the following line: "hdmi_force_hotpulg=1"
That forces the pi to output HDMI even if it doesn't detect a monitor. That fixed it!
We also determined that the USB hub was drawing too much power from the pi, and also the keyboard lights did start working.
Okay, now Monday, we started by soldering the pin holes on the Zero 1 to pins provided by the nifty ten dollar case I bought from amazon that has a micro USB to USB A adapter, a mini HDMI to full size HDMI adapter, and I think it also has a pi on/off switch for the power cord.
I had never soldered before so this was a learning experience. Apparently the solder already has flux inside it which cleans the oxidation off the solder. I had been watching Louis Rossman YouTube videos for years where he would just talk about stuff while he would solder a bunch of stuff with a Mac laptop motherboard and use tons of flux. So I was aware of some of this stuff. I just learn better when I do it myself.
Doug did about half of the pins for me to show me and to help get me through so the soldering was finished before the end of the class. And then he watched me do a few and left me to finish the rest of them and then came and checked them when I was done. I think there is something like forty pins, he did half, and he only fixed two of the ones I did when I was done. He and I both were surprised to see how quickly I got through it. He was expecting this to take all class.
He showed me how you hold the side of the iron to a pin and heat it up and then after a little bit, you sneak the solder in and touch the pin--not the iron with the solder. You want the solder to melt when it touches the pin and then sink into the pin hole on the Pi and cover all the copper all the way around the pin. The metal just sort of clings to the point its supposed to be and then sinks into place. If you did it right, then it sort of cleans itself up in a way, there won't be a mess. I started having problems where I would bring the solder in a few seconds after touching the iron to the pin and then the solder, all of the roll of the solder would then be soldered to the pin. I couldn't figure out what I was doing wrong but Doug explained that that happens when you don't wait for it to heat up more before touching the solder to the pin.
The soldering was done and I did my part of it in about fifteen or twenty minutes.
I went about connecting the case to the Zero 1 and then connected the Pi to my new micro USB hub with extra USB A ports and an ethernet port. I was so sure that with a Zero, you could either plug the hub I bought, which does do passthrough power, to either the power only micro USB and use the hub to power the Zero 1, or I could connect it to the data port and get the benefits of the extra USB ports and now the ethernet port as well. Doug said that he had both data and power over the same USB on his Zero at home. He had me google if the data and power needed to be activated both at the same time or something and the first thing that came up said that the right port is power only and has no data pins, but the left micro USB port has both power and data pins. So Doug plugged in my hub while plugged into power to the data and power plug, and it worked.
I later concluded that I might have been having problems with my Pi Zero 2W before I gave it to Jayden because I was also using one of those Pi on/off switch adapters for the power cord so you don't have to keep plugging and unplugging the Pi to reboot it or just leave it turned off, and so I might have had it plugged into the data/power port with that power switch adapter plugged in, and so I would only get power on one or data on the other, which I would only plug in the data stuff anyway if I wasn't using it as a power switch so I would remove the power switch adapter whenever transferring the hub to the data port. So this explains why it only did data on the data/power port on my Zero 2W, and only did power on the power port.
We ran a SUDO APT UPDATE and then a SUDO APT UPGRADE, Doug stopped me before I pressed Y and enter to confirm the upgrades, he asked me what his rule is, "I don't know!" He said, "If it's a capitol Y and a lowercase n, that means you can simply press enter and it will automatically assume you meant the capitalized letter, which is Y.
PS C:\Users\Christian> ssh user@192.168.1.188
The authenticity of host '192.168.1.188 (192.168.1.188)' can't be established.
ED25519 key fingerprint is SHA256:pyKs4OG3q3jT4nXvzBesQdBDy2BFrjmEI/VfXBeUC8U.
This key is not known by any other names
Are you sure you want to continue connecting (yes/no/[fingerprint])? yes
Warning: Permanently added '192.168.1.188' (ED25519) to the list of known hosts.
user@192.168.1.188's password:
Linux weatherstation 6.1.21+ #1642 Mon Apr 3 17:19:14 BST 2023 armv6l
The programs included with the Debian GNU/Linux system are free software;
the exact distribution terms for each program are described in the
individual files in /usr/share/doc/*/copyright.
Debian GNU/Linux comes with ABSOLUTELY NO WARRANTY, to the extent
permitted by applicable law.
Last login: Mon Mar 11 19:17:40 2024
user@weatherstation:~ $ sudo apt update
Get:1 http://archive.raspberrypi.org/debian bullseye InRelease [23.6 kB]
Get:2 http://raspbian.raspberrypi.org/raspbian bullseye InRelease [15.0 kB]
Get:3 http://archive.raspberrypi.org/debian bullseye/main armhf Packages [313 kB]
Get:4 http://raspbian.raspberrypi.org/raspbian bullseye/main armhf Packages [13.2 MB]
Fetched 13.6 MB in 38s (355 kB/s)
Reading package lists... Done
Building dependency tree... Done
Reading state information... Done
13 packages can be upgraded. Run 'apt list --upgradable' to see them.
user@weatherstation:~ $ sudo apt upgrade
Reading package lists... Done
Building dependency tree... Done
Reading state information... Done
Calculating upgrade... Done
The following packages will be upgraded:
bsdextrautils bsdutils eject fdisk libblkid1 libfdisk1 libmount1 libsmartcols1 libuuid1 libwbclient0 mount rfkill
util-linux
13 upgraded, 0 newly installed, 0 to remove and 0 not upgraded.
Need to get 2,978 kB of archives.
After this operation, 0 B of additional disk space will be used.
Do you want to continue? [Y/n]
Get:1 http://raspbian.raspberrypi.org/raspbian bullseye/main armhf bsdutils armhf 1:2.36.1-8+deb11u2 [139 kB]
Get:2 http://raspbian.raspberrypi.org/raspbian bullseye/main armhf libblkid1 armhf 2.36.1-8+deb11u2 [181 kB]
Get:3 http://raspbian.raspberrypi.org/raspbian bullseye/main armhf libuuid1 armhf 2.36.1-8+deb11u2 [82.7 kB]
Get:4 http://raspbian.raspberrypi.org/raspbian bullseye/main armhf libfdisk1 armhf 2.36.1-8+deb11u2 [226 kB]
Get:5 http://raspbian.raspberrypi.org/raspbian bullseye/main armhf libmount1 armhf 2.36.1-8+deb11u2 [193 kB]
Get:6 http://raspbian.raspberrypi.org/raspbian bullseye/main armhf libsmartcols1 armhf 2.36.1-8+deb11u2 [144 kB]
Get:7 http://raspbian.raspberrypi.org/raspbian bullseye/main armhf fdisk armhf 2.36.1-8+deb11u2 [178 kB]
Get:8 http://raspbian.raspberrypi.org/raspbian bullseye/main armhf util-linux armhf 2.36.1-8+deb11u2 [1,038 kB]
Get:9 http://raspbian.raspberrypi.org/raspbian bullseye/main armhf mount armhf 2.36.1-8+deb11u2 [177 kB]
Get:10 http://raspbian.raspberrypi.org/raspbian bullseye/main armhf bsdextrautils armhf 2.36.1-8+deb11u2 [138 kB]
Get:11 http://raspbian.raspberrypi.org/raspbian bullseye/main armhf libwbclient0 armhf 2:4.13.13+dfsg-1~deb11u6 [296 kB]
Get:12 http://raspbian.raspberrypi.org/raspbian bullseye/main armhf eject armhf 2.36.1-8+deb11u2 [98.9 kB]
Get:13 http://raspbian.raspberrypi.org/raspbian bullseye/main armhf rfkill armhf 2.36.1-8+deb11u2 [86.6 kB]
Fetched 2,978 kB in 16s (186 kB/s)
Reading changelogs... Done
(Reading database ... 43926 files and directories currently installed.)
Preparing to unpack .../bsdutils_1%3a2.36.1-8+deb11u2_armhf.deb ...
Unpacking bsdutils (1:2.36.1-8+deb11u2) over (1:2.36.1-8+deb11u1) ...
Setting up bsdutils (1:2.36.1-8+deb11u2) ...
(Reading database ... 43926 files and directories currently installed.)
Preparing to unpack .../libblkid1_2.36.1-8+deb11u2_armhf.deb ...
Unpacking libblkid1:armhf (2.36.1-8+deb11u2) over (2.36.1-8+deb11u1) ...
Setting up libblkid1:armhf (2.36.1-8+deb11u2) ...
(Reading database ... 43926 files and directories currently installed.)
Preparing to unpack .../libuuid1_2.36.1-8+deb11u2_armhf.deb ...
Unpacking libuuid1:armhf (2.36.1-8+deb11u2) over (2.36.1-8+deb11u1) ...
Setting up libuuid1:armhf (2.36.1-8+deb11u2) ...
(Reading database ... 43926 files and directories currently installed.)
Preparing to unpack .../libfdisk1_2.36.1-8+deb11u2_armhf.deb ...
Unpacking libfdisk1:armhf (2.36.1-8+deb11u2) over (2.36.1-8+deb11u1) ...
Preparing to unpack .../libmount1_2.36.1-8+deb11u2_armhf.deb ...
Unpacking libmount1:armhf (2.36.1-8+deb11u2) over (2.36.1-8+deb11u1) ...
Setting up libmount1:armhf (2.36.1-8+deb11u2) ...
(Reading database ... 43926 files and directories currently installed.)
Preparing to unpack .../libsmartcols1_2.36.1-8+deb11u2_armhf.deb ...
Unpacking libsmartcols1:armhf (2.36.1-8+deb11u2) over (2.36.1-8+deb11u1) ...
Setting up libsmartcols1:armhf (2.36.1-8+deb11u2) ...
(Reading database ... 43926 files and directories currently installed.)
Preparing to unpack .../fdisk_2.36.1-8+deb11u2_armhf.deb ...
Unpacking fdisk (2.36.1-8+deb11u2) over (2.36.1-8+deb11u1) ...
Preparing to unpack .../util-linux_2.36.1-8+deb11u2_armhf.deb ...
Unpacking util-linux (2.36.1-8+deb11u2) over (2.36.1-8+deb11u1) ...
Setting up util-linux (2.36.1-8+deb11u2) ...
fstrim.service is a disabled or a static unit not running, not starting it.
(Reading database ... 43926 files and directories currently installed.)
Preparing to unpack .../mount_2.36.1-8+deb11u2_armhf.deb ...
Unpacking mount (2.36.1-8+deb11u2) over (2.36.1-8+deb11u1) ...
Preparing to unpack .../bsdextrautils_2.36.1-8+deb11u2_armhf.deb ...
Unpacking bsdextrautils (2.36.1-8+deb11u2) over (2.36.1-8+deb11u1) ...
Preparing to unpack .../libwbclient0_2%3a4.13.13+dfsg-1~deb11u6_armhf.deb ...
Unpacking libwbclient0:armhf (2:4.13.13+dfsg-1~deb11u6) over (2:4.13.13+dfsg-1~deb11u5) ...
Preparing to unpack .../eject_2.36.1-8+deb11u2_armhf.deb ...
Unpacking eject (2.36.1-8+deb11u2) over (2.36.1-8+deb11u1) ...
Preparing to unpack .../rfkill_2.36.1-8+deb11u2_armhf.deb ...
Unpacking rfkill (2.36.1-8+deb11u2) over (2.36.1-8+deb11u1) ...
Setting up bsdextrautils (2.36.1-8+deb11u2) ...
Setting up libwbclient0:armhf (2:4.13.13+dfsg-1~deb11u6) ...
Setting up eject (2.36.1-8+deb11u2) ...
Setting up rfkill (2.36.1-8+deb11u2) ...
Setting up libfdisk1:armhf (2.36.1-8+deb11u2) ...
Setting up mount (2.36.1-8+deb11u2) ...
Setting up fdisk (2.36.1-8+deb11u2) ...
Processing triggers for libc-bin (2.31-13+rpt2+rpi1+deb11u8) ...
Processing triggers for man-db (2.9.4-2) ...
Processing triggers for mailcap (3.69) ...
Here we were about to pack up for the night when I asked Doug if we could change the username. So he did so real quick. We can't see what he did in the nano text editor though.
user@weatherstation:~ $ sudo nano /etc/hostname
user@weatherstation:~ $ sudo nano /etc/hostname
user@weatherstation:~ $ sudo nano /etc/hosts
user@weatherstation:~ $
We entered one file and changed the hostname he gave it when we were troubleshooting a problem that caused us to keep re-imagine the disk, and changed it to "rpiweather". He said however that it would be best if we didn't change any passwords or usernames until we were done with the project.
Tuesday 2024-04-23
I was just thinking of doing something like a disaster movie, DAY 2 after all the cities were destroyed by the aliens and survivors are fleeing aimlessly...I wanted to see if my micro USB Pi on/off switch adapter carried a data signal and plugged it in between the Pi and the hub, connected ethernet to the hub and tried to SSH into it, and nothing happened. It got power! But then I did IPCONFIG to see what my default gateway was so I could search that in my browser and check the device list on the router web interface and see if my Pi was listed after we removed the on/off switch adapter and plugged it back in, and checked wired connections and found rpiweather listed there. I checked it's current IP address since its on DHCP, and then I SSH-ed into it.
PS C:\Users\Christian> ssh user@192.168.1.188
ssh: connect to host 192.168.1.188 port 22: Connection timed out
PS C:\Users\Christian> ipconfig
...
Default Gateway . . . . . . . . . :
...
Default Gateway . . . . . . . . . : 192.168.1.1
PS C:\Users\Christian> ssh user@192.168.1.188
user@192.168.1.188's password:
Linux rpiweather 6.1.21+ #1642 Mon Apr 3 17:19:14 BST 2023 armv6l
...
user@rpiweather:~ $ sudo apt update
Get:1 http://raspbian.raspberrypi.org/raspbian bullseye InRelease [15.0 kB]
Get:2 http://archive.raspberrypi.org/debian bullseye InRelease [23.6 kB]
Get:3 http://raspbian.raspberrypi.org/raspbian bullseye/main armhf Packages [13.2 MB]
Get:4 http://archive.raspberrypi.org/debian bullseye/main armhf Packages [313 kB]
Fetched 13.6 MB in 37s (363 kB/s)
Reading package lists... Done
Building dependency tree... Done
Reading state information... Done
All packages are up to date.
user@rpiweather:~ $ sudo apt upgrade
Reading package lists... Done
Building dependency tree... Done
Reading state information... Done
Calculating upgrade... Done
0 upgraded, 0 newly installed, 0 to remove and 0 not upgraded.
Doug said I needed to set up the hat so I could use it before I could expect anything to come out of the display. So I looked for anything that would show me how to get the Waveshare e-ink 7.5 inch screen hat set up. I came across a website for Waveshare "https://www.waveshare.com/wiki/7.5inch_e-Paper_HAT_Manual#Working_With_Raspberry_Pi", and the guy on GitHub said first to go SUDO RASPI-CONFIG. But Doug was of the mind that we don't know if those instructions only work for the alternative Inky wHAT display he was using. So on the above listed website I found the instructions for setting this up for the Waveshare screen I bought that matches the Inky wHAT screen the GitHub guy used.
user@rpiweather:~ $ sudo raspi-config
And so far, in the instructions that come after connecting the hardware, the first thing said to do is also to go SUDO RASPI-CONFIG. These instructions however, say to go to 5 INTERFACING OPTIONS > P4 SPI, however, I stupidly just went to option 5 to discover that on my Pi Zero, Interface Options is actually option 3. And then go P4 SPI, and select enable SPI Interface.
Back in the INTERFACE menu, I also had to enable I2C.
Enable I2C!
Go SUDO REBOOT!
user@rpiweather:~ $ sudo reboot
user@rpiweather:~ $ Connection to 192.168.1.188 closed by remote host.
Connection to 192.168.1.188 closed.
I rebooted and SSH-ed back in. Then I updated again just in case before installing Git, which I will explain in a bit.
user@rpiweather:~ $ sudo apt update
Hit:1 http://raspbian.raspberrypi.org/raspbian bullseye InRelease
Hit:2 http://archive.raspberrypi.org/debian bullseye InRelease
Reading package lists... Done
Building dependency tree... Done
Reading state information... Done
All packages are up to date.
user@rpiweather:~ $ sudo apt install git
Reading package lists... Done
Building dependency tree... Done
Reading state information... Done
The following additional packages will be installed:
git-man liberror-perl
Suggested packages:
git-daemon-run | git-daemon-sysvinit git-doc git-el git-email git-gui gitk gitweb git-cvs git-mediawiki git-svn
The following NEW packages will be installed:
git git-man liberror-perl
0 upgraded, 3 newly installed, 0 to remove and 0 not upgraded.
Need to get 6,564 kB of archives.
After this operation, 33.1 MB of additional disk space will be used.
Do you want to continue? [Y/n]
Get:1 http://mirrors.syringanetworks.net/raspbian/raspbian bullseye/main armhf liberror-perl all 0.17029-1 [31.0 kB]
Get:2 http://raspbian.raspberrypi.org/raspbian bullseye/main armhf git-man all 1:2.30.2-1+deb11u2 [1,828 kB]
Get:3 http://raspbian.raspberrypi.org/raspbian bullseye/main armhf git armhf 1:2.30.2-1+deb11u2 [4,704 kB]
Fetched 6,564 kB in 11s (600 kB/s)
Selecting previously unselected package liberror-perl.
(Reading database ... 43926 files and directories currently installed.)
Preparing to unpack .../liberror-perl_0.17029-1_all.deb ...
Unpacking liberror-perl (0.17029-1) ...
Selecting previously unselected package git-man.
Preparing to unpack .../git-man_1%3a2.30.2-1+deb11u2_all.deb ...
Unpacking git-man (1:2.30.2-1+deb11u2) ...
Selecting previously unselected package git.
Preparing to unpack .../git_1%3a2.30.2-1+deb11u2_armhf.deb ...
Unpacking git (1:2.30.2-1+deb11u2) ...
Setting up liberror-perl (0.17029-1) ...
Setting up git-man (1:2.30.2-1+deb11u2) ...
Setting up git (1:2.30.2-1+deb11u2) ...
Processing triggers for man-db (2.9.4-2) ...
So, Git is sort of like APT for installing packages, it will go retrieve repository libraries from GitHub so your device can use them.
Now the two sets of instructions I am following, the one from GitHub because the guy built the weather display I want to do, and the other because this guy used an Inky screen, and I am using Waveshare, I am then also following Waveshares instructions. I asked Doug from here what he thought I should do because he said that the guy on GitHub's instructions might work with my Waveshare just fine. But I would have to go into the code and do some programming to get his code to work with my screen. Or I could follow the Waveshare instructions. The fear I have is that if I do the latter, there will be too much of a deviation from the instructios on GitHub because it's his project I am doing. Doug suggested that we to the GitHub instructions for now and see how they work, and if they don't we can then just switch back to following the Waveshare instructions.
Even if this makes it harder, Doug usually has a good reason for it because I will learn something or learn how to do more without his help. Or I will just get exposed to more things. Plus, we just don't know what will happen. It may be that the GitHub instructions are sufficient.
user@rpiweather:~ $ curl https://get.pimoroni.com/inky | bash
% Total % Received % Xferd Average Speed Time Time Time Current
Dload Upload Total Spent Left Speed
100 34932 100 34932 0 0 5920 0 0:00:05 0:00:05 --:--:-- 8069
This script will install everything needed to use
Inky pHAT & wHAT
Always be careful when running scripts and commands copied
from the internet. Ensure they are from a trusted source.
This script should -- only be run on a Raspberry Pi with RPi OS --
other systems and SBCs are not supported and may explode!
If you want to see what this script does before running it,
you should run: 'curl https://get.pimoroni.com/inky'
Note: Inky pHAT & wHAT requires SPI communication
Note: Inky pHAT & wHAT requires I2C communication
Do you wish to continue? [y/N] y
Checking hardware requirements...
Checking for packages required for GPIO control...
raspi-gpio is already installed
....................................RPi.GPIO installed and up-to-date
SPI already enabled
Checking packages required by SPI interface...
spidev installed and up-to-date
I2C already enabled
Checking packages required by I2C interface...
Python 2 smbus installed and up-to-date
Python 3 smbus installed and up-to-date
Inky pHAT & wHAT comes with examples and documentation that you may wish to install.
Performing a full install will ensure those resources are installed,
along with all required dependencies. It may however take a while!
Do you wish to perform a full install? [y/N]
Checking for dependencies...
python3-numpy is already installed
python3-pil is already installed
python3-lxml is required
Installing python3-lxml...
python3-smbus is already installed
Installing Inky pHAT & wHAT library for Python 3...
Looking in indexes: https://pypi.org/simple, https://www.piwheels.org/simple
Collecting inky
Downloading https://www.piwheels.org/simple/inky/inky-1.5.0-py3-none-any.whl (32 kB)
Requirement already satisfied: spidev in /usr/lib/python3/dist-packages (from inky) (3.5)
Requirement already satisfied: numpy in /usr/lib/python3/dist-packages (from inky) (1.19.5)
Collecting smbus2
Downloading https://www.piwheels.org/simple/smbus2/smbus2-0.4.3-py2.py3-none-any.whl (11 kB)
Installing collected packages: smbus2, inky
Successfully installed inky-1.5.0 smbus2-0.4.3
Checking for additional software...
python3-geocoder is required
Installing python3-geocoder...
E: Unable to locate package python3-geocoder
Apt failed to install python3-geocoder!
Falling back on pypi...
Looking in indexes: https://pypi.org/simple, https://www.piwheels.org/simple
Collecting geocoder
Downloading https://www.piwheels.org/simple/geocoder/geocoder-1.38.1-py2.py3-none-any.whl (98 kB)
|████████████████████████████████| 98 kB 223 kB/s
WARNING: Retrying (Retry(total=4, connect=None, read=None, redirect=None, status=None)) after connection broken by 'ProtocolError('Connection aborted.', RemoteDisconnected('Remote end closed connection without response'))': /simple/click/
Collecting click
Downloading https://www.piwheels.org/simple/click/click-8.1.7-py3-none-any.whl (97 kB)
|████████████████████████████████| 97 kB 272 kB/s
Requirement already satisfied: requests in /usr/lib/python3/dist-packages (from geocoder) (2.25.1)
Collecting future
Downloading https://www.piwheels.org/simple/future/future-1.0.0-py3-none-any.whl (491 kB)
|████████████████████████████████| 491 kB 255 kB/s
Collecting ratelim
Downloading https://www.piwheels.org/simple/ratelim/ratelim-0.1.6-py2.py3-none-any.whl (4.0 kB)
Requirement already satisfied: six in /usr/lib/python3/dist-packages (from geocoder) (1.16.0)
Collecting decorator
Downloading https://www.piwheels.org/simple/decorator/decorator-5.1.1-py3-none-any.whl (10 kB)
Installing collected packages: decorator, ratelim, future, click, geocoder
Successfully installed click-8.1.7 decorator-5.1.1 future-1.0.0 geocoder-1.38.1 ratelim-0.1.6
python3-beautifulsoup4 is required
Installing python3-beautifulsoup4...
E: Unable to locate package python3-beautifulsoup4
Apt failed to install python3-beautifulsoup4!
Falling back on pypi...
Looking in indexes: https://pypi.org/simple, https://www.piwheels.org/simple
Requirement already satisfied: beautifulsoup4 in /usr/lib/python3/dist-packages (4.9.3)
Requirement already satisfied: soupsieve>1.2 in /usr/lib/python3/dist-packages (from beautifulsoup4) (2.2.1)
python3-qrcode is required
Installing python3-qrcode...
python3-icalendar is required
Installing python3-icalendar...
python3-fonts is required
Installing python3-fonts...
E: Unable to locate package python3-fonts
Apt failed to install python3-fonts!
Falling back on pypi...
Looking in indexes: https://pypi.org/simple, https://www.piwheels.org/simple
Collecting fonts
Downloading https://www.piwheels.org/simple/fonts/fonts-0.0.3-py3-none-any.whl (4.2 kB)
Installing collected packages: fonts
Successfully installed fonts-0.0.3
python3-font_hanken_grotesk is required
Installing python3-font_hanken_grotesk...
E: Unable to locate package python3-font_hanken_grotesk
Apt failed to install python3-font_hanken_grotesk!
Falling back on pypi...
Looking in indexes: https://pypi.org/simple, https://www.piwheels.org/simple
Collecting font_hanken_grotesk
Downloading https://www.piwheels.org/simple/font-hanken-grotesk/font_hanken_grotesk-0.0.2-py3-none-any.whl (391 kB)
|████████████████████████████████| 391 kB 251 kB/s
Installing collected packages: font-hanken-grotesk
Successfully installed font-hanken-grotesk-0.0.2
python3-font_intuitive is required
Installing python3-font_intuitive...
E: Unable to locate package python3-font_intuitive
Apt failed to install python3-font_intuitive!
Falling back on pypi...
Looking in indexes: https://pypi.org/simple, https://www.piwheels.org/simple
Collecting font_intuitive
Downloading https://www.piwheels.org/simple/font-intuitive/font_intuitive-0.0.4-py3-none-any.whl (36 kB)
Installing collected packages: font-intuitive
Successfully installed font-intuitive-0.0.4
python3-font_fredoka_one is required
Installing python3-font_fredoka_one...
E: Unable to locate package python3-font_fredoka_one
Apt failed to install python3-font_fredoka_one!
Falling back on pypi...
Looking in indexes: https://pypi.org/simple, https://www.piwheels.org/simple
Collecting font_fredoka_one
Downloading https://www.piwheels.org/simple/font-fredoka-one/font_fredoka_one-0.0.4-py3-none-any.whl (27 kB)
Installing collected packages: font-fredoka-one
Successfully installed font-fredoka-one-0.0.4
python3-font_source_serif_pro is required
Installing python3-font_source_serif_pro...
E: Unable to locate package python3-font_source_serif_pro
Apt failed to install python3-font_source_serif_pro!
Falling back on pypi...
Looking in indexes: https://pypi.org/simple, https://www.piwheels.org/simple
Collecting font_source_serif_pro
Downloading https://www.piwheels.org/simple/font-source-serif-pro/font_source_serif_pro-0.0.1-py3-none-any.whl (1.8 MB)
|████████████████████████████████| 1.8 MB 1.9 MB/s
Installing collected packages: font-source-serif-pro
Successfully installed font-source-serif-pro-0.0.1
python3-font_source_sans_pro is required
Installing python3-font_source_sans_pro...
E: Unable to locate package python3-font_source_sans_pro
Apt failed to install python3-font_source_sans_pro!
Falling back on pypi...
Looking in indexes: https://pypi.org/simple, https://www.piwheels.org/simple
Collecting font_source_sans_pro
Downloading https://www.piwheels.org/simple/font-source-sans-pro/font_source_sans_pro-0.0.1-py3-none-any.whl (2.2 MB)
|████████████████████████████████| 2.2 MB 1.8 MB/s
Installing collected packages: font-source-sans-pro
Successfully installed font-source-sans-pro-0.0.1
python3-wikiquotes is required
Installing python3-wikiquotes...
E: Unable to locate package python3-wikiquotes
Apt failed to install python3-wikiquotes!
Falling back on pypi...
Looking in indexes: https://pypi.org/simple, https://www.piwheels.org/simple
Collecting wikiquotes
Downloading https://www.piwheels.org/simple/wikiquotes/wikiquotes-1.4-py3-none-any.whl (20 kB)
Collecting slacker
Downloading https://www.piwheels.org/simple/slacker/slacker-0.14.0-py3-none-any.whl (9.4 kB)
Collecting bs4
Downloading https://www.piwheels.org/simple/bs4/bs4-0.0.2-py2.py3-none-any.whl (1.2 kB)
Requirement already satisfied: lxml in /usr/lib/python3/dist-packages (from wikiquotes) (4.6.3)
Requirement already satisfied: requests in /usr/lib/python3/dist-packages (from wikiquotes) (2.25.1)
Collecting unidecode
Downloading https://www.piwheels.org/simple/unidecode/Unidecode-1.3.8-py3-none-any.whl (235 kB)
|████████████████████████████████| 235 kB 259 kB/s
Requirement already satisfied: beautifulsoup4 in /usr/lib/python3/dist-packages (from bs4->wikiquotes) (4.9.3)
Requirement already satisfied: soupsieve>1.2 in /usr/lib/python3/dist-packages (from beautifulsoup4->bs4->wikiquotes) (2.2.1)
Installing collected packages: unidecode, slacker, bs4, wikiquotes
Successfully installed bs4-0.0.2 slacker-0.14.0 unidecode-1.3.8 wikiquotes-1.4
Downloading examples and documentation...
Resources for your Inky pHAT & wHAT were copied to
/home/user/Pimoroni/inky
Finalising Install...
Some packages could not be installed, review the output for details!
user@rpiweather:~ $ client_loop: send disconnect: Connection reset
The next instructions on GitHub are to install pyOWM. pyOWM is a python library that utilizes the OpenWeatherMaps APIs.
So, while it was installing curl https://get.pimoroni.com/inky | bash, it was unable to install several packages and then disconnected from SSH at the end. I missed this because I moved right on to installing the weather API next and none of the commands such as pip or sudo or anything was recognized. I then saw that the user went from being "user@rpiweather:~ $" at the beginning of every command to "PS C:\Users\(my name)>"
Discovered that it's that time of night where the wifi gives out. I told Doug that the Pi was on a wired connection since this is a wifi issue, so the installation probably wasn't interrupted, but the printing on the screen is interrupted and what happened after that is gone/. He suggested I redo the curl https://get.pimoroni.com/inky | bash command again. Oof, that was taking some time. Dangit! Class is almost over. I was hoping to get a little further than this.
Fortunately it skipped a few things that were already done.
user@rpiweather:~ $ curl https://get.pimoroni.com/inky | bash
% Total % Received % Xferd Average Speed Time Time Time Current
Dload Upload Total Spent Left Speed
100 34932 100 34932 0 0 3510 0 0:00:09 0:00:09 --:--:-- 7871
This script will install everything needed to use
Inky pHAT & wHAT
Always be careful when running scripts and commands copied
from the internet. Ensure they are from a trusted source.
This script should -- only be run on a Raspberry Pi with RPi OS --
other systems and SBCs are not supported and may explode!
If you want to see what this script does before running it,
you should run: 'curl https://get.pimoroni.com/inky'
Note: Inky pHAT & wHAT requires SPI communication
Note: Inky pHAT & wHAT requires I2C communication
Do you wish to continue? [y/N] y
Checking environment...
Updating apt indexes...
.....................
Checking hardware requirements...
Checking for packages required for GPIO control...
raspi-gpio is already installed
RPi.GPIO installed and up-to-date
SPI already enabled
Checking packages required by SPI interface...
spidev installed and up-to-date
I2C already enabled
Checking packages required by I2C interface...
Python 2 smbus installed and up-to-date
Python 3 smbus installed and up-to-date
Inky pHAT & wHAT comes with examples and documentation that you may wish to install.
Performing a full install will ensure those resources are installed,
along with all required dependencies. It may however take a while!
Do you wish to perform a full install? [y/N] Y
Checking for dependencies...
python3-numpy is already installed
python3-pil is already installed
python3-lxml is already installed
python3-smbus is already installed
Installing Inky pHAT & wHAT library for Python 3...
Looking in indexes: https://pypi.org/simple, https://www.piwheels.org/simple
Requirement already satisfied: inky in /usr/local/lib/python3.9/dist-packages (1.5.0)
Collecting inky
Using cached https://www.piwheels.org/simple/inky/inky-1.5.0-py3-none-any.whl (32 kB)
Downloading https://www.piwheels.org/simple/inky/inky-1.4.0-py3-none-any.whl (28 kB)
Requirement already satisfied: spidev in /usr/lib/python3/dist-packages (from inky) (3.5)
Requirement already satisfied: smbus2 in /usr/local/lib/python3.9/dist-packages (from inky) (0.4.3)
Requirement already satisfied: numpy in /usr/lib/python3/dist-packages (from inky) (1.19.5)
Checking for additional software...
python3-geocoder is required
Installing python3-geocoder...
E: Unable to locate package python3-geocoder
Apt failed to install python3-geocoder!
Falling back on pypi...
Looking in indexes: https://pypi.org/simple, https://www.piwheels.org/simple
Requirement already satisfied: geocoder in /usr/local/lib/python3.9/dist-packages (1.38.1)
Requirement already satisfied: six in /usr/lib/python3/dist-packages (from geocoder) (1.16.0)
Requirement already satisfied: future in /usr/local/lib/python3.9/dist-packages (from geocoder) (1.0.0)
Requirement already satisfied: click in /usr/local/lib/python3.9/dist-packages (from geocoder) (8.1.7)
Requirement already satisfied: ratelim in /usr/local/lib/python3.9/dist-packages (from geocoder) (0.1.6)
Requirement already satisfied: requests in /usr/lib/python3/dist-packages (from geocoder) (2.25.1)
Requirement already satisfied: decorator in /usr/local/lib/python3.9/dist-packages (from ratelim->geocoder) (5.1.1)
python3-beautifulsoup4 is required
Installing python3-beautifulsoup4...
E: Unable to locate package python3-beautifulsoup4
Apt failed to install python3-beautifulsoup4!
Falling back on pypi...
Looking in indexes: https://pypi.org/simple, https://www.piwheels.org/simple
Requirement already satisfied: beautifulsoup4 in /usr/lib/python3/dist-packages (4.9.3)
Requirement already satisfied: soupsieve>1.2 in /usr/lib/python3/dist-packages (from beautifulsoup4) (2.2.1)
python3-qrcode is already installed
python3-icalendar is already installed
python3-fonts is required
Installing python3-fonts...
E: Unable to locate package python3-fonts
Apt failed to install python3-fonts!
Falling back on pypi...
Looking in indexes: https://pypi.org/simple, https://www.piwheels.org/simple
Requirement already satisfied: fonts in /usr/local/lib/python3.9/dist-packages (0.0.3)
python3-font_hanken_grotesk is required
Installing python3-font_hanken_grotesk...
E: Unable to locate package python3-font_hanken_grotesk
Apt failed to install python3-font_hanken_grotesk!
Falling back on pypi...
Looking in indexes: https://pypi.org/simple, https://www.piwheels.org/simple
Requirement already satisfied: font_hanken_grotesk in /usr/local/lib/python3.9/dist-packages (0.0.2)
python3-font_intuitive is required
Installing python3-font_intuitive...
E: Unable to locate package python3-font_intuitive
Apt failed to install python3-font_intuitive!
Falling back on pypi...
Looking in indexes: https://pypi.org/simple, https://www.piwheels.org/simple
Requirement already satisfied: font_intuitive in /usr/local/lib/python3.9/dist-packages (0.0.4)
python3-font_fredoka_one is required
Installing python3-font_fredoka_one...
E: Unable to locate package python3-font_fredoka_one
Apt failed to install python3-font_fredoka_one!
Falling back on pypi...
Looking in indexes: https://pypi.org/simple, https://www.piwheels.org/simple
Requirement already satisfied: font_fredoka_one in /usr/local/lib/python3.9/dist-packages (0.0.4)
python3-font_source_serif_pro is required
Installing python3-font_source_serif_pro...
E: Unable to locate package python3-font_source_serif_pro
Apt failed to install python3-font_source_serif_pro!
Falling back on pypi...
Looking in indexes: https://pypi.org/simple, https://www.piwheels.org/simple
Requirement already satisfied: font_source_serif_pro in /usr/local/lib/python3.9/dist-packages (0.0.1)
python3-wikiquotes is required
Installing python3-wikiquotes...
E: Unable to locate package python3-wikiquotes
Apt failed to install python3-wikiquotes!
Falling back on pypi...
Looking in indexes: https://pypi.org/simple, https://www.piwheels.org/simple
Requirement already satisfied: wikiquotes in /usr/local/lib/python3.9/dist-packages (1.4)
Requirement already satisfied: bs4 in /usr/local/lib/python3.9/dist-packages (from wikiquotes) (0.0.2)
Requirement already satisfied: unidecode in /usr/local/lib/python3.9/dist-packages (from wikiquotes) (1.3.8)
Requirement already satisfied: requests in /usr/lib/python3/dist-packages (from wikiquotes) (2.25.1)
Requirement already satisfied: slacker in /usr/local/lib/python3.9/dist-packages (from wikiquotes) (0.14.0)
Requirement already satisfied: lxml in /usr/lib/python3/dist-packages (from wikiquotes) (4.6.3)
Requirement already satisfied: beautifulsoup4 in /usr/lib/python3/dist-packages (from bs4->wikiquotes) (4.9.3)
Requirement already satisfied: soupsieve>1.2 in /usr/lib/python3/dist-packages (from beautifulsoup4->bs4->wikiquotes) (2.2.1)
Downloading examples and documentation...
The examples directory already exists on your system!
We've backed them up as examples-backup, just in case you've changed anything!
Resources for your Inky pHAT & wHAT were copied to
/home/user/Pimoroni/inky
Finalising Install...
Some packages could not be installed, review the output for details!
user@rpiweather:~ $ pip install pyowm
Looking in indexes: https://pypi.org/simple, https://www.piwheels.org/simple
Collecting pyowm
Downloading pyowm-3.3.0-py3-none-any.whl (4.5 MB)
|████████████████████████████████| 4.5 MB 10 kB/s
Collecting geojson<3,>=2.3.0
Downloading https://www.piwheels.org/simple/geojson/geojson-2.5.0-py2.py3-none-any.whl (14 kB)
Requirement already satisfied: requests<3,>=2.20.0 in /usr/lib/python3/dist-packages (from pyowm) (2.25.1)
Collecting PySocks<2,>=1.7.1
Downloading https://www.piwheels.org/simple/pysocks/PySocks-1.7.1-py3-none-any.whl (16 kB)
Installing collected packages: PySocks, geojson, pyowm
Successfully installed PySocks-1.7.1 geojson-2.5.0 pyowm-3.3.0
user@rpiweather:~ $
user@rpiweather:~ $ git clone https://github.com/Hothomir/weather-report.git
Cloning into 'weather-report'...
remote: Enumerating objects: 377, done.
remote: Counting objects: 100% (34/34), done.
remote: Compressing objects: 100% (14/14), done.
remote: Total 377 (delta 30), reused 20 (delta 20), pack-reused 343
Receiving objects: 100% (377/377), 228.46 KiB | 745.00 KiB/s, done.
Resolving deltas: 100% (160/160), done.
user@rpiweather:~ $ cd weather-report/
user@rpiweather:~/weather-report $ nano configfile.ini
We were looking at the details of installing andadjusting the weather API for my Pi, and Doug wanted to see how we would make these adjustments so he nono'd into it.
user@rpiweather:~/weather-report $ exit
Thats it for the day!
Thursday 2024-04-25
Today went a lot slower than I thought. I always intend to come in and get right started with a project but I am SCRUM Master in class right now and for some reason it always takes an hour to get that over with, talking with everyone in the group about where they are in their studies, and then getting everyone to agree on a research assignment for the weekend. I feel like people should just say a quick little thing without droning on endlessly, my classmates disagree. The SCRUM meetings are actually intended to keep people productive, not give them a reason to not be productive by talking about what they're doing endlessly and having full fledged conversations about it and joking and stuff.
So then I suggested a research assignment of making a batch script, Chey said he doesn't want to do that, it sounds pointless and unpleasant and I tried to convince him that its not the case by showing him scripts I use regularly to manage various things on my file server and this is when I discovered because I am doing a cleaning check at my apartment right now, something must have gotten jostled and so now I have no internet access, so I disabled my VPN and re-enabled it because sometimes that's the problem, it just needs the connection refreshed again, and that didn't fix it and then I realized when I was jostling my router because I was trying to clean up a problem on my desk with speakers for my sound system which was right next to the router, this must have unplugged the router. So no VPN or server today, and if it is activated, then I have no internet access.
Then Doug started talking to me about why I might be having problems using my VPN for the livingroom laptop that we use to play movies downstairs from my file server and he thought it had to be a problem with the VPN and it's a long story why but basically my roommate has his router and I have my router and I did a port forward on both of them for my server, and because I gave the downstairs laptop access to my VPN while being plugged into my roommates router, that means everything goes outside of my network and then back and then to my router and then to my server which could be slowing files down. Doug made a suggestion that could speed this up after I told him the laptop won't play files of certain sizes and up and 4k files and he was so sure it was because of the VN exiting my roommates routers network and then back in and then to mine and then my server and back and all that. But I told him I transferred the file to the laptop and played it and it still didn't work and then he was satisfied it wasn't my VPN.
So after all this talk and then Doug finally convincing Chey that actually eh should do a research assignment on what batch scripts are and how they work, then we could do that this next week, where he could actually create one that he would use, since this is actually a really good thing to learn. So I am an affective SRUM Master if you think I am a good leader, but only because of my ideas because I don't exactly inspire followers to go along with my ideas. Ha ha!
So I SSH-ed into my Pi for the weather project again:
user@rpiweather:~ $ git clone https://github.com/Hothomir/weather-report.git
fatal: destination path 'weather-report' already exists and is not an empty directory.
user@rpiweather:~ $ ls
Pimoroni weather-report
user@rpiweather:~ $ cd weather-report
user@rpiweather:~/weather-report $ ls
cond_icons.py configfile.ini impression-main.py LICENSE main.py __pycache__ README.md resources
Now that we edited the configfile.ini with nano to use the key that we were given from an API we created an account for, and added my location data into the configfile.ini file.
user@rpiweather:~/weather-report $ python main.py
Traceback (most recent call last):
File "/home/user/weather-report/main.py", line 14, in <module>
import cond_icons
File "/home/user/weather-report/cond_icons.py", line 14, in <module>
OWMAPI = configObj["OWM_API"]
File "/usr/lib/python3.9/configparser.py", line 960, in __getitem__
raise KeyError(key)
KeyError: 'OWM_API'
When I created an account with https://openweathermap.org/api, there was a page that had a key that was already created for me, but it had no label. We copied that into the script and now it's throwing errors for the API. So we tried creating another key, and labelling it this time as 'WatherDisplay'. We copied the key and used nano to edit the configfile.ini file. And then I tried running the program again.
raise KeyError(key)
KeyError: 'OWM_API'
We googled the error but that didn't produce anything useful except that the python script couldn't find the config file. So we looked based on that error, the stack tracer, the chain of messages from that error, we looked at the line of code that was giving the error and that's when we saw the file path was wrong. Doug was looking at File "/home/user/weather-report/cond_icons.py", line 14, in <module> and checked file path, which said "/home/pi/weather-report/configfile.ini" and Doug asked me if that file path looked right. I told him I only knew the weather-report/configfile.ini part of the file path because I had to cd into it. That's when he realized that the GitHub project we were going off of had all the code reflecting an older version of Raspbian OS where the user was always Pi. Our username is user. So we had to change the file path in every part in his code that used the wrong file path.
user@rpiweather:~/weather-report $ grep -RH "/home/pi" .
This command allowed us to look at every problem. Initially we just searched Pi instead of the file path and this brought up numerous things that said 'pip' and 'api' and many other things including just what we were looking for, this was a long list of things that looked like they needed to be corrected but we were able to lose a lot of this confusion by redoing the grep command to reflect the file path instead.
Since we were running out of time and Doug is seasoned at this, he went ahead and did all the nano edits himself, there were five or so and he was able to do it one minute. Class is now over.
Doug wanted me to see results with this so we kept working for a little while. Course this goes into the brief period of time each day when he gets to see his wife. So he only does this once in a while.
Doug did more of those grep commands, kind of an intuition thing because he has messed with a lot of code, and then he figured that the URI (URL for API's), URI's are different from URL's but this is an explanation for another time. And the URI has changed from what is in his code. The Open Weather Map website uses a different URI than they used to.
We started floating the idea that I may need to find another project on GitHub that is even more current because all sorts of things are wrong with this guys code, every time we fixed a bunch of errors, we would use the grep command and find a whole bunch more errors.
Doug had an idea that since this is such a problem, getting the API to work, we need to just make a call and see if this API even works at all. So we need to manually do it, not through the Pi Zero but through my computer to see if it returns results from an API call. He had the idea that we could install Postman, a GUI program that will run API calls. And then we will go from there, but that's for next week, provided I actually pass my A+ core 2 certification exam. I failed it a few weeks ago and will get kicked from the program if I fail it tomorrow and again after that two weeks from now. So tomorrows test results determine what I am focusing all my energy n for the next two weeks.
Monday 2024-04-29
I SSH-ed into my Pi again and I installed Postman on my Windows laptop, the free non-account version so we could make an API phone call to test the API code in this GitHub project and see if the whole thing needs to be trashed and we need to find another one that does the same thing or if this is at all salvageable or whatever. We keep getting keys from openweathermap.org.
Doug instantly got annoyed with my Windows PowerShell and installed the official PowerShell Terminal that runs even better. He got annoyed that we couldn't scroll in Nano on my Pi Zero. Then he discovered that it will wasn't scrolling and figured that it must have been an option he enabled.
We used Postman to see if the openweathermaps.org API was the problem. To make a n API call in Postman, we pasted "https://api.openweathermap.org/data/2.5/weather?lat={lat}&lon={lon}&appid={API key}" in there and ran it. It worked fine, it gave us weather data through Postman that we could see and so the problem isn't with the openweathermaps.org API.
But the API was failing, that's how we found out that the current API was working, but there was a problem with the One Call API. One Call is something that the website made up that gives you all the weather details while making a single API call instead of having to make multiple API calls for each detail. The One Call API was failing for two reasons, one we didn't subscribe to it because we didn't purchase the subscription. Two, they are deprecating the 2.5 One Call API for a new version called 3.0 which is not supported by the Python script that was written by the guy on GitHub that created the package we were using. His package used 2.5, and this can't be easily remedied because 2.5 One Call is written countless times throughout the code, and to fix that and all the other problems similar to this, would basically require rewriting the whole package and constantly error checking endlessly until it worked, which would be a nightmare and not worth doing. Almost sounds like writing a new one from scratch would be easier and I don't even know how.
That's when we decided that we will have to abandon the script and write our own or find another one. So then that's when we chanted gears today to just trying to get the E-ink display to function. So we pulled up one of the other Waveshare tabs I had open on my laptop for the past few months now so then we installed their instructions to install some of their packages and download their demo script and we plugged the screen in after shutting it down. First Doug installed all the code for the C language and realized what he did and then went back to delete all the things he installed so we could start over because we discovered instructions with Python which would have been much easier.
C would be better but you would have to compile it, Python is the fad language right now so there will be a lot more resources online for it, in a nutshell. Doug actually prefers C for things like this because the code is lighter weight, but for me, he said I would have a lot more resources to hold my hand with Python.
https://www.waveshare.com/wiki/7.5inch_e-Paper_HAT_Manual#Working_With_Raspberry_Pi
Python
- Install the function library:
sudo apt-get update
sudo apt-get install python3-pip
sudo apt-get install python3-pil
sudo apt-get install python3-numpy
sudo pip3 install RPi.GPIO
sudo pip3 install spidev
- Install function library (python2):
sudo apt-get update
sudo apt-get install python-pip
sudo apt-get install python-pil
sudo apt-get install python-numpy
sudo pip install RPi.GPIO
sudo pip install spidev
- Install gpiozero library (it is installed in the system by default, if not, you can install it by following the commands below):
sudo apt-get update
# python3
sudo apt install python3-gpiozero
# python2
sudo apt install python-gpiozero
- Download the demo via GitHub (You can skip this step if you have downloaded it.)
git clone https://github.com/waveshare/e-Paper.git
cd e-Paper/RaspberryPi_JetsonNano/
- Download the demo (You can skip this step if you have downloaded it.)
wget https://files.waveshare.com/upload/7/71/E-Paper_code.zip
unzip E-Paper_code.zip -d e-Paper
cd e-Paper/RaspberryPi_JetsonNano/
# Make sure it's in e-Paper/RaspberryPi_JetsonNano/
cd python/examples/
python3 epd_7in5_V2_test.py
The screen worked!!!!!!!!!
Then we spent a couple minutes looking at the demo code for the E-ink display to see how it works and we found online that the display wears out real quick if it isn't put to sleep with the display left on it within a certain amount of time, I think ti said like within 180 seconds or something, it said you need to refresh it within at least 180 seconds. And then it recommended that you do a full refresh once a day which is easily done in code. So all we needed to do was figure out how to put it in low power mode sleep after something was written to the screen.
We looked at the code in the demo to try to figure it out and to test it, and we changed it to not clear the screen before putting it to sleep, using the sleep command which I will enter later_____________and Doug put hashtags for comments in code throughout all code that showed all sorts of other things on the screen and then commented out the two commands that clear the display, and then I was worried about it getting that message stuck on the screen because he shut down the Pi with stuff on the screen, I didn't know any better. So Doug booted it again and went back into Nano to remove the comment hashtag character from the two screen clearing commands and ran it, the screen cleared, no problem.
when ssh into pi, do ls and then cd into weather-display then ls then cd into the main.py file to change all the variables of placement fint size etcetera
Thursday
CLI PS C:\Users\Christian> scp -r user@192.168.1.188:~/weather-report/resources/icons .\Desktop\weatherdisplay
to update display go sudo python3 main.py
to update the background image with the lines go scp -r .\Desktop\weatherdisplay\* user@192.168.1.188:~/weather-report/resources/.
MAKE SURE IT IS A 1 BIT IMAGE, THERE CANNOT BE ANY GRAY WHATSOEVER OR THE SIPLAY WITH MALFUNCTION, EVERYTHING ABSOLUTELY MUST BE EITHER BLACK OR WHTIE!!!!!!!!!!!
user@192.168.1.188's password:
moon.png 100% 1762 344.5KB/s 00:00
few_clouds_moon.png 100% 1442 350.5KB/s 00:00
light_rain.png 100% 1400 302.6KB/s 00:00
fog.png 100% 1167 284.9KB/s 00:00
clouds.png 100% 1442 466.7KB/s 00:00
snow.png 100% 1459 405.8KB/s 00:00
thunderstorm.png 100% 1529 426.0KB/s 00:00
location.png 100% 630 204.5KB/s 00:00
sun.png 100% 1643 534.1KB/s 00:00
rain.png 100% 1390 386.0KB/s 00:00
thunder.png 100% 1515 493.3KB/s 00:00
few_clouds_sun.png 100% 1603 518.7KB/s 00:00
PS C:\Users\Christian> scp -r user@192.168.1.188:~/weather-report/resources/background .\Desktop\weatherdisplay
user@192.168.1.188's password:
test.png 100% 612 149.8KB/s 00:00
weather-report-bg.png 100% 721 155.4KB/s 00:00
PS C:\Users\Christian> ssh user@192.168.1.188
user@192.168.1.188's password:
Linux rpiweather 6.1.21+ #1642 Mon Apr 3 17:19:14 BST 2023 armv6l
The programs included with the Debian GNU/Linux system are free software;
the exact distribution terms for each program are described in the
individual files in /usr/share/doc/*/copyright.
Debian GNU/Linux comes with ABSOLUTELY NO WARRANTY, to the extent
permitted by applicable law.
Last login: Thu May 2 18:50:15 2024 from 192.168.1.118
user@rpiweather:~ $ ls
Pimoroni weather-report
user@rpiweather:~ $ cd weather-report/
user@rpiweather:~/weather-report $ ls
cond_icons.py configfile.ini main.py __pycache__ README.md resources
user@rpiweather:~/weather-report $ nano main.py
user@rpiweather:~/weather-report $ nano configfile.ini
user@rpiweather:~/weather-report $ nano main.py
user@rpiweather:~/weather-report $ nano main.py
user@rpiweather:~/weather-report $ ls
cond_icons.py configfile.ini main.py __pycache__ README.md resources
user@rpiweather:~/weather-report $ nano main.py
user@rpiweather:~/weather-report $ cp main.py backupmain.py
user@rpiweather:~/weather-report $ nano main.py
user@rpiweather:~/weather-report $ cat main.py
# WEATHER DISPLAY - Bartosz Jaskulski
#
# Modified by Doug Webb
import os, sys
from datetime import datetime, timedelta
import cond_icons
import configparser
# config.ini file
configObj = configparser.ConfigParser()
configObj.read("/home/user/weather-report/configfile.ini")
OWMAPI = configObj["OWM_API"]
UserLoc = configObj["Location"]
api = OWMAPI["api"]
lat =float(UserLoc["latitude"])
lon = float(UserLoc["longitude"])
city = str(UserLoc["city"])
country = str(UserLoc["country"])
# Waveshare Libraries
from waveshare_epd import epd7in5_V2
from PIL import Image, ImageFont, ImageDraw
epd = epd7in5_V2.EPD()
# pyOWM Libraries
from pyowm.owm import OWM
from pyowm.utils import config
from pyowm.utils import timestamps
CURR_DIR = os.path.dirname(os.path.realpath(__file__)) + "/"
RESOURCES = CURR_DIR + "resources/"
# Fonts
PIXEL_FONT = RESOURCES + "fonts/Pixel12x10.ttf"
Terminal_FONT = RESOURCES + "fonts/terminal-grotesque.ttf"
Mister_Pixel_FONT = RESOURCES + "fonts/Mister_Pixel_Regular.otf"
B_FONT = RESOURCES + "fonts/04B_03.ttf"
VG5000_FONT = RESOURCES + "fonts/VG5000-Regular.otf"
FT88Reg_FONT = RESOURCES + "fonts/FT88-Regular.otf"
Matrix_FONT = RESOURCES + "fonts/MATRIX.ttf"
TimeDate = datetime.now()
OneDaysTime = (datetime.now()+timedelta(days=1)).strftime("%A")
TwoDaysTime = (datetime.now()+timedelta(days=2)).strftime("%A")
ThreeDaysTime = (datetime.now()+timedelta(days=3)).strftime("%A")
FourDaysTime = (datetime.now()+timedelta(days=4)).strftime("%A")
degreeSign = u"\N{DEGREE SIGN}"
# OpenWeatherMap Integration
owm = OWM(api)
mgr = owm.weather_manager()
weather = mgr.weather_at_place(city+","+country).weather
forecast = mgr.forecast_at_place(city+","+country, '3h')
getTemp = weather.temperature("fahrenheit") # Enables temp in fahrenheit
curTemp = int(getTemp["temp"]) # Get current temp
# Current "feels like" temperature
feelsLike = int(getTemp["feels_like"])
currentFeelsLike = "Feels: "+str(feelsLike)+degreeSign
# Current max and min temps
maxTemp = int(getTemp["temp_max"])
minTemp = int(getTemp["temp_min"])
# Current wind speeds
getWind = weather.wind(unit="miles_hour")
curWind = int(getWind["speed"])
img = Image.open("/home/user/weather-report/resources/background/weather-report-bg.png")
draw = ImageDraw.Draw(img)
font_tiny = ImageFont.truetype(Matrix_FONT, 24)
font_small = ImageFont.truetype(Matrix_FONT, 24)
font_medium = ImageFont.truetype(Matrix_FONT, 55)
font_medium2 = ImageFont.truetype(Matrix_FONT, 36)
font_big = ImageFont.truetype(Matrix_FONT, 140)
font2 = ImageFont.truetype(Matrix_FONT, 20)
currentTemp = str(curTemp)+degreeSign
currentMaxTemp = "Max: "+str(maxTemp)+degreeSign # Current temp max
currentMinTemp = "Min: "+str(minTemp)+degreeSign # Current temp min
tomorrow = timestamps.tomorrow()
twodays = tomorrow + timedelta(days=1)
threedays = tomorrow + timedelta(days=2)
fourdays = tomorrow + timedelta(days=3)
OneDayTemp = str(int(forecast.get_weather_at(tomorrow).temperature("fahrenheit").get("temp", 0))) # Get temp in 1 day
OneDayCond = str(forecast.get_weather_at(tomorrow).status)
TwoDayTemp = str(int(forecast.get_weather_at(twodays).temperature("fahrenheit").get("temp", 0))) # Get temp in 2 days
TwoDayCond = str(forecast.get_weather_at(twodays).status)
ThreeDayTemp = str(int(forecast.get_weather_at(threedays).temperature("fahrenheit").get("temp", 0))) # Get temp in 3 days
ThreeDayCond = str(forecast.get_weather_at(threedays).status)
FourDayTemp = str(int(forecast.get_weather_at(fourdays).temperature("fahrenheit").get("temp", 0))) # Get temp in 4 days
FourDayCond = str(forecast.get_weather_at(fourdays).status)
currentCond = str(weather.status)
currentDetailCond = str(weather.detailed_status).title()
currentHumidity = "Hum:"+str(weather.humidity)+"%"
currentWind = "Wind:"+str(curWind)+" MPH"
currentLoc = ": " + city
# Math for proper text placement
projectName = "DOUG'S WEATHER REPORT"
w_name, h_name = font2.getsize(projectName)
x_name = 400 - (w_name/2)
w_OneDayTemp, h_OneDayTemp = font_medium.getsize(OneDayTemp)
x_OneDayTemp = (100) - (w_OneDayTemp/2)
w_OneDaysTime, h_OneDaysTime = font_tiny.getsize(OneDaysTime)
x_OneDaysTime = 100 - (w_OneDaysTime/2)
w_OneDayCond, h_OneDayCond = font_tiny.getsize(OneDayCond)
x_OneDayCond = 100 - (w_OneDayCond/2)
w_TwoDayTemp, h_TwoDayTemp = font_medium.getsize(TwoDayTemp)
x_TwoDayTemp = (300) - (w_TwoDayTemp/2)
w_TwoDaysTime, h_TwoDaysTime = font_tiny.getsize(TwoDaysTime)
x_TwoDaysTime = 300 - (w_TwoDaysTime/2)
w_TwoDayCond, h_TwoDayCond = font_tiny.getsize(TwoDayCond)
x_TwoDayCond = 300 - (w_TwoDayCond/2)
w_ThreeDayTemp, h_ThreeDayTemp = font_medium.getsize(ThreeDayTemp)
x_ThreeDayTemp = (500) - (w_ThreeDayTemp/2)
w_ThreeDaysTime, h_ThreeDaysTime = font_tiny.getsize(ThreeDaysTime)
x_ThreeDaysTime = 500 - (w_ThreeDaysTime/2)
w_ThreeDayCond, h_ThreeDayCond = font_tiny.getsize(ThreeDayCond)
x_ThreeDayCond = 500 - (w_ThreeDayCond/2)
w_FourDayTemp, h_FourDayTemp = font_medium.getsize(FourDayTemp)
x_FourDayTemp = (700) - (w_FourDayTemp/2)
w_FourDaysTime, h_FourDaysTime = font_tiny.getsize(FourDaysTime)
x_FourDaysTime = 700 - (w_FourDaysTime/2)
w_FourDayCond, h_FourDayCond = font_tiny.getsize(FourDayCond)
x_FourDayCond = 700 - (w_FourDayCond/2)
# Draw data and text onto display
# To place text, use draw.text((x,y),text,font = font)
draw.text((5, 4),TimeDate.strftime("%m-%d-%Y"), font = font2, fill = 255) # Date
draw.text((235, 210),TimeDate.strftime("%I:%M %p"), font = font_big) # Time
draw.text((x_name, 4),projectName, font = font2, fill = 255) # Project name
draw.text((315, 40), currentTemp, font = font_big) # Current temp
draw.text((510, 60), "o", font = font_medium2) # Degree symbol
draw.text((584, 75), currentMaxTemp, font = font_small) # Current max temp
draw.text((584, 105), currentMinTemp, font = font_small) # Current min temp
draw.text((584, 39), currentFeelsLike, font = font_small)
draw.text((x_OneDayTemp, 395), OneDayTemp+degreeSign, font = font_medium) # Temp in 1 day
draw.text((x_TwoDayTemp, 395),TwoDayTemp+degreeSign, font = font_medium) # Temp in 2 days
draw.text((x_ThreeDayTemp, 395), ThreeDayTemp+degreeSign, font = font_medium) # Temp in 3 days
draw.text((x_FourDayTemp, 395), FourDayTemp+degreeSign, font = font_medium) # Temp in 4 days
draw.text((x_OneDayCond, 455), OneDayCond, font = font_tiny) # Condition in 1 day
draw.text((x_TwoDayCond, 455), TwoDayCond, font = font_tiny) # Condition in 2 days
draw.text((x_ThreeDayCond, 455), ThreeDayCond, font = font_tiny) # Condition in 3 days
draw.text((x_FourDayCond, 455), FourDayCond, font = font_tiny) # Condition in 4 days
draw.text((x_OneDaysTime, 380), OneDaysTime, font = font_tiny) # DOtW in 1 day
draw.text((x_TwoDaysTime, 380), TwoDaysTime, font = font_tiny) # DOtW in 2 days
draw.text((x_ThreeDaysTime, 380), ThreeDaysTime, font = font_tiny) # DOtW in 3 days
draw.text((x_FourDaysTime, 380), FourDaysTime, font = font_tiny) # DOtW in 4 days
draw.text((584, 150), currentHumidity, font = font_small) # Current humidity in percentage
draw.text((584, 200), currentWind, font = font_small) # Current wind speed in MPH
draw.text((10, 40), currentDetailCond, font = font_medium2) # Current weather conditions, detailed
black = Image.open("/home/user/weather-report/resources/icons/black.png")
img.paste(black, (10, 80))
#img.paste(cond_icons.CurrCondIcon(), (30, 75)) # Current Weather Icon
# Write image to the screen
epd.init() # Turn screen on
epd.display(epd.getbuffer(img)) # Send image to screen
epd.sleep() # Turn screen off
user@rpiweather:~/weather-report $
Monday 2024-05-06
Last Friday Doug had some extra time while he was network administering at BYU, and decided to find a way to get my Pi Zero to process an image into black and white, since the display only does straight black and white, it would have to use a process called dithering to disperse black and white dots in such a fashion that a grayscale image could be created to create the whites, the blacks, and different amounts of white or black dots mixed together to make all the in-between tones of gray. This is Dithering. He created a script that once an image is uploaded through the SCP command on my Pi while SSH-ed into my Pi from the computer that has the file. You would type for example "scp "C:\Users\Christian\Dropbox\...\...\...IMG_3626-3.JPG" user@192.168.1.188:~/.", and then it asks for the password you use to SSH into the device.
The result was stuff like this:

In class today we got a kick out of running Doug's script on a few pictures and displaying them on my paperwhite e-ink display for the weather display. Everyone wanted to come look at it, Doug was pleased with his work, he went around explaining to everyone what he did. And he is doing another thing too, since we are placing everything on the screen and moving them around for the weather display before finalizing this part of the project, instead of taking the time to have the code process in Python and print everything to the e-ink display, which can take about thirty seconds every time you make a change and want to see the results, Doug has decided to have the computer SSH-ing into the Pi do the processing and then create a black and white image of what it would look like on the e-ink display, which would be much faster. He is clearly trying to speed this project up so we can get me passed with CompTIA Network +.
I got to work on fine tuning the thumbnail images that will show what the sky is doing like partly cloudy or raining or snowing or sunshine. They are all pixelated from the GitHub project we've been working from.
Doug is also working on a script that hopefully will only refresh the clock every minute rather than the whole display, kind of like a Kindle only refreshes part of the page if there's only a small change, rather than refreshing the screen, inverting it and refreshing it again. Although, while this will look nicer, his concern is that the minute to minute refresh just for the clock would wear the screen way down real quick. However, this would also still wear out the part of the screen that displays the clock just as much as the whole screen would be worn out now the way it currently works with an entire screen refresh.
Wednesday 2024-05-06
Doug came up with a way to set it up so if I ever wanted to display something different on the display than the weather, it can show a dithered image with the clock over it and we got the clock placed. He was trying to install an update to Python3 to do this however it lagged out and we sat there after class was over for like forty five minutes and he cancelled it and rewrote the script to this:
import sys
from PIL import Image, ImageFont, ImageDraw
from waveshare_epd import epd7in5_V2
from datetime import datetime, timedelta
# Open the given image
try:
img = Image.open(sys.argv[1])
except:
print("An error occured opening the image. Make sure the file is given as a parameter.")
exit()
# Crop and resize the image to fit on the e-ink display
width, height = img.size
ratio = width / height
if ratio < 5/3:
removal = (height - 3 * width / 5) / 2
img = img.crop((0,removal,width,height - removal))
else:
removal = (width - 5 * height / 3) / 2
img = img.crop((removal,0,width - removal,height))
img = img.resize((800,480))
# Convert image to B+W only
img = img.convert('1')
# img.save('bwwibg.png')
The reason for this update to Python3 would have been so that he could write an algorithm that would count how many white pixels were in the black and white dithered image so it would change the color of the time being displayed either white or black so the time is easier to see. We did already sort of fix this problem however because he put a white border around the time when it is black or a black one when it is white. We had it set to black at first because we thought it was cool. with the Matrix movie cover font I found a .ttf file for, and uploaded this font file to the Pi and in a certain folder so that it could be used with this project.
And it looks like this:
We did do something Thursday but I don't remember what it was other than that it was basically a continuation of Wednesdays work. Well, I did change the font from Matrix to Linkin Parks Hybrid Theories album cover font that I think Mike Shinoda came up with when he did the album cover. Doug predicted that this font would be a totally different size, so all of my perfect placements of the time and weather and everything and the sizes that I wanted would then be a waste of time. He was right.
Monday 2024-05-13
We added a bunch of pictures of mine that I like and Doug solved the problem why the algorithm wasn't properly counting all the white pixels and then displaying the time in the best tone, wither white or black depending on the overall tone of the picture.
He taught me the SCP command in Linux. I created a folder named pictures on my desktop and then I SSH-ed into the device and typed "scp -r .\Desktop\pictures\ user@192.168.1.188:~/." Scp means secure copy, - lowercase r means recursive so you not only copy the folder but its contents as well. You type a space and then a period which means to do the thing right here but is optional in some cases, but it confirms absolutely that this is where you want it, but after you type the -r and a space, the period tells the system to do the thing here, if you look at the directory the command is being typed in or the working directory, the period tells it to start there and then we can finish typing the file path from the working directory rather than retyping the whole file path. Then type a backslash then the source. This is where we finish typing the address which doesn't have to be entered completely from scratch. Doug calls this a local address when you can just continue from where the working directory is and finish typing the file path. So Desktop\pictures\, every time I typed another folder location to the file path we would press tab to make sure it was entered correctly. And then since pictures is the folder we want to copy, I typed a space and then the user@the ip address that we want to copy the pictures to. At the end of the ip address, I typed a colin, tilde (~) which represents home, and another period to specify that this is where I want it moved. "Right here!" is basically what it's saying.,
Monday 2024-05-20
Last Thursday, I don't recall getting much work done, Doug was working on an algorithm for the alternate time display he's been doing as a challenge to himself, which will choose what place to put the time over one of my images I've uploaded to the Pi according to what part of the image has the most whites or most blacks. I didn't like that very much because I predicted that the algorithm might decide that the darkest or lightest part of the image to put the time in happens to be the focal point of the image, say like the lightest or darkest part of the image happens to be al of your families faces in a family photo. However I decided that the focal point of the typical image would have more tonal differences, more nuance, and so will likely need to be well lit but with good definition in the details. So it would not be the darkest or lightest part of the image by definition.
But there's one problem, I will always want the weather even though I really like the time display with my images dithered on this display, so I thought, wait, what if we combined the two things? I asked Doug what the possibilities of putting my photography behind the weather so basically combining his project he is adding onto my project and we spent much of the class discussing how hard that would be and how he got the time text to show up in front of my photography in a way that's easy to read.
Basically, he made four layers of text and told the Pi in Python code to put all four of those layers in roughly the same spot but in a plus shape, so there are four layers positioned the exact same pixels away from each other for every character, an 8 written to the screen if it is black on a brighter image, will have white outline around it, and he creates this outline by putting an 8 below the black 8, but it's white and a few pixels up, and then there's another a few pixels to the left, and another to the right and another to a few pixels down. This could also be done in an x fashion and create the same result.
But that means all code has to be replicated four more times under the main layer, all with slightly different pixel coordinates. With the amount of layers I have for my weather display, he did some quick math and said that currently it is x amount of lines and this would cause for it to now have to be another 120 lines of code or something like that.
And I started thinking of alternatives, he said he isn't going to do it because that would take so much time and goes into personal passion territory so I would have to do it myself and I contemplated doing it myself and then he sited that what we are doing isn't even my project anymore, and this is the definition of scope creep. When I told him this is just an idea I was curious about, we're not implementing it and I haven't even decided if I would, he said that this is the problem, I don't have a working, self updating display yet. Everything still needs to be arranged on the display. I haven't hardly touched it most of this week, and so we need to finish that because we even think about doing other things.
However, Friday I committed myself to actually working on getting the one thing I wanted to do finished so it's out of the way. All I wanted to do going forward since I mostly like all the placements and the display basically has everything I want aside from new ideas like my photography in the background. All I really need to do now is tidy up some font problems. I have changed the font for the display from the Matrix movie cover font I was using to this Linkin Park album cover font from Hybrid Theories that I really liked, which I think Mike Shinoda sprayed somewhere and they put on the inside of the album cover I think, so their band name has this weird but cool font I like so I found it online and kept it for years now incase I ever had the opportunity to use it. And I decided I wanted to use it now but this font unfortunately has no numbers. And I decided to stick with the numbers from the Matrix movie cover, which means everything now has to be divided up between the two fonts, which means there is a lot of text that just says things like that it feels like 55 degrees and I need to figure out how to put the "feels like" in Linkin Park font, and the actual temperature text in Matrix font.
Friday I started looking at how to do this since I was kind of understanding the Python code well enough to make changes myself without Doug standing over me constantly, but not any change. And then I couldn't figure out how to do this. I tried to figure out where the actual text was written in the code to be printed to the screen, but I couldn't. I made some effort to try and figure out how to solve this problem going forward so I can figure these things out for myself without Doug holding my hand through everything. And this is especially time critical because technically I am supposes to be done with school in a month even though I easily have about three more months of classwork ahead of me and no time to do it except for when I'm in class, which is my project time where I can get Doug's help.
Doug had the idea of me doing an hour and a half at the beginning of class for classwork and then the last hour and a half for projects since he agreed I learn a great deal from these projects and the ultimate goal was for me to come here to brush up and also to do projects, and not so much to get certified even though there are lots of benefits to these certifications from CompTIA. So I have been doing that even though it isn't helping me to keep up in class.
So I talked to Doug about how I was going through the problem of trying to figure out how to separate the code for the letters and the numbers so I can use two different fonts for each and I spent some time going through trying to figure out how to do this just for one little thing on the display, which would open the door to being able to do it for the rest of the display. I told Doug if I could go through with him on how I was trying to solve the problem right up to the point where I got stuck, maybe he would be able to point out what I do wrong when I am about to get stuck and then we can work on this right before I leave this class and hopefully i will finally consider myself competent...haha.
So he did. We have font objects, and then we had strong which are just text like the string HELLO or APPLE or whatever and the object font, which gives me a font type and size. And I mentioned how a problem I was having when testing is I will ask him questions about a test question I got, and I can't figure out but then he will just point out the thing I seemed to ignore, which I already understood but somehow missed, and I will say something like "Hey Doug, ...[test question about TELNET which is port 23] ..., I don't understand what it means when it gives me 4 IP addresses that start with 10 and they are...the first one has five octets, that can't be right, no IPv4 address has five octets!" He's like, "What is the last octet?" "It's a 56 for all but the last one...which is twenty thr...three. Huhhhhh! I missed that the dot between the last two octets wasn't a dot, it was a colin, this is an address with a port number for a certain protocol other than the default protocol. Got it, thanks Doug!" I miss it every single time!
So I was hoping Doug could do one of those and then my 'figure it out yourself' problem will be solved. So I started explaining where I was about to get stuck when he interrupted and said that I already texted him about this back on Friday when I was doing this and he already knows where I got stuck. Oh? And he explained, I want you to go to the top of the document and start telling me what each line does. SO I was like, actually, I think I can do that with some ease.
"img = Image.open("background/weather-report-bg.png")"
This line refers to the image that stands as the background, and it equates "img" with this document. It opens it and puts everything on top of it since code later dictates that it's in the back of everything, the backdrop everything is set against.
"draw = ImageDraw.Draw(img)"
This tells it to draw the image.
We went through several lines and it started to become clear that I wasn't paying attention to everything even though I understood a lot of it. He suggested that just like when I take tests, if I really work to make sure I understand each individual part of the question before moving on the understand each of the next parts and the multiple choice answers, then I should do much better on my tests. He suggested I do the same thing here. So now it is becoming apparent that what I struggle with is seeing everything that is right in front of me and giving it due attention.
I think what is going on here is I have a thing called Low Latency Inhibition, so I notice a lot of details about things that others ignore, and so I have to basically reinterpret everything on its own merits rather than just automatically seeing that every doorknob is just a doorknob, I have to wrap my head around it first and then eventually realize what it is. This is happening because most peoples Visual Cortex will take in all the stimuli the eyes pick up and process it and it has to throw a great deal of information away by determining what's important, and it's not doing this for me. An example of what this looks like is if you're being chased by a bear, you're not giving the slightest bit of thought to the pretty flowers on the side of the path you're running on. All of your focus is on the path and staying away from the bear and not getting eaten alive. So all those details like that piece of trash someone didn't throw away and that sign that says "Beware of Bears" all get thrown away by the Visual Cortex so you can narrow your focus according to the situation. Mine doesn't do that as much as others does. So I see a lot more things and pay attention to details that don't always matter which causes me to draw conclusions that are often useless. This is frustrating. However it does have a major benefit, which I only seldom get to enjoy. This is the same condition that Sherlock Holmes has. But his is dialed to eleven.
"...they go up to eleven, does that mean it's louder? Is it any louder?"
"Well, it's one louder [than 10] isn't it?! It's not ten. You see, most blokes are gonna be play'n at ten, ...you're on ten on your guitar, where can you go from there? Where?"
"I don't know."
"Nowhere! Exactly. What we do is if we need that extra push over the cliff, you know what we do?"
"Put it up to eleven."
"Eleven, exactly! One louder!"
"Why don't you just make ten louder and make ten be the top number and make that a little louder?
"...[pointing] these go to eleven!"
Sherlock Holmes can look at something one time and derive all these details from it, and come to all sorts of conclusions. The difference is he does this very fast, with multiple details, uses them to come to a number of conclusions...and he is uh ... right about his conclusions a lot of the time.
So yeah, now that I drew the link between myself and the nonexistent genius of Sherlock Holmes, I will end there for tonight.
Monday 2024-06-03
I got a little carried away with working on the project and not writing about it. But the big problem here is that my instructor did most of the programming that actually got all the parts to work. But he wasn't going to manually adjust the placements, sizes and fonts and pictures of everything on the display for me especially since I have such particular tastes. And little did I know, this project was going to really introduce me to coding. And I suppose it couldn't have been a better language that Python because Python is so ubiquitous right now.
At first, the display was going to have just a white image behind the text with a few lines and a black header line to put white text on to say the name of the project and give the time in tiny text and so on. And eventually came a point where I got tired of adjusting the lines in paint.net (my photoshop is on the fritz), which separate the current feels like temperature from the minimum temp, max temp, humidity and wind speed. I got rid of the black lines because I felt that they were unnecessary.
I know I already talked about this, but at this same time Doug was working on an alternate program to put on my Pi to work with my e-ink display, so if for whatever reason I got tired of displaying the weather, which I don't think I will because I am a weather enthusiast and always want to know conditions before I go outside so I don't need to come back upstairs to grab my coat or something, Doug created a program that just displays the time against an image. Then he got fancy and created an algorithm that will look at the image and if it's a darker image, it will switch the time text from white to black or visa versa. Then he created another algorithm that will place the time text in any one of the four corners depending on where there's the most contrast to put the text against, so if there's more black pixels then it'll display white text for example. He got all this working and I started to actually really kind of want to buy another Pi and another screen so I could have this as a dedicated clock in another spot in my room. I wondered why Doug was doing this even though I was definitely all about the weather display and apparently he just wanted to challenge himself.
We also determined that there were still cases where the time text was hard to see so he found a way to put outlines around all the numbers. This turns out to be interesting and I ended up utilizing it in a big way. He was against adding it himself to my weather display to make it look cooler because he said how many lines of code I have right now and that he would be multiplying that by 120 or some huge number and he was absolutely not going to do that. I asked, well, you're not going to discourage me from doing it are you? He said no. And then explained how to do it. So I did it.
I started getting to work about a week and a half or two weeks ago on arranging the text on the weather display in the code. In some ways the code wasn't the prettiest because Doug wasn't all about making things easy to interpret but he then added comments at the end of many lines and labeled them, so I kept up the tradition when I made changes and even redid some of his and sorted parts of the code out for my liking since I have a hard time seeing things that are right in front of me. I kept making changes and not being able to find things so I started to organize things to my liking. I think I will go ahead and paste the code as it is right now or maybe the final version at the end.
I changed the current temperature and the time so they were the most prominent on the screen. And then added some of my favorite fonts to the code. I have things like a certain Linkin Park font I used for most alphabetical text on the screen and then all the numbers used Matrix movie cover font.
Doug put an outline of layers in python code to make the time stand out better no matter what image was displayed behind the clock and that made me want to do it too. So he showed me how to do it since this would add so many lines of code for every single line printed to the page that he was not about to touch that himself, he said we can't do that because he won't do it and I asked him how hard it would be for me to do it and it turned out it was quite simple and I was perfectly willing to take the time to do this for myself.
Then we were talking last Thursday about how I haven't been doing the research assignments and I said well I suppose I'd be willing to put a few minutes into writing a research assignment paper on how to do the layers in python code for the text on my weather display and Doug said ok, in fact, I want you to write it like it's an entry in a knowledge base, which is a good skill to have. SO he pulled up an example of a knowledge base which he writes all the time for his other job at BYU, which people can then reference if they need to replicate what he did and he isn't there or he can't do it or whatever.
So, here's what I wrote:
Layering Text in Python Code with draw.text
Assuming you already know how to do some coding in Python3, this guide will demonstrate how to layer your text in order to create a cool effect or to outline text so that it's easier to see for example, if it is drawn in front of a dynamic image, which makes seeing lettering more difficult to see.
Lets say you have a string of text such as the time being displayed in a screen:
"draw.text((293, 198),TimeDate.strftime("%I:%M"), font = font_big)"
In this image, the time has the affect applied to the time.
In this particular case, the text automatically displays as black, using a Matrix movie cover font. However, if for example you wanted the text to diaplay as white with a black outline, you can add "fill = 'white'" isolated by commas from the rest of the code and you can add this after "TimeDate.strftime("%I:%M"),", or you can add this to the end after the font is specified, preceeded with a comma.
"draw.text((305, 204),TimeDate.strftime("%I:%M"), fill = 'white', font = font_big)"
However as you want the text to be white in this case with a black outline or shadows for the text, you would write all the lines of code in a layer fashion for all of the outline text or shadow text to lie underneath the main text, and the last line will the text with the "fill = 'white'" command. The code for text with 5 layers of shadows looks like this:
"draw.text((293, 198),TimeDate.strftime("%I:%M"), font = font_big)
draw.text((299, 210),TimeDate.strftime("%I:%M"), font = font_big)
draw.text((309, 198),TimeDate.strftime("%I:%M"), font = font_big)
draw.text((307, 208),TimeDate.strftime("%I:%M"), font = font_big)
draw.text((294, 208),TimeDate.strftime("%I:%M"), font = font_big)
draw.text((305, 204),TimeDate.strftime("%I:%M"), fill = 'white', font = font_big)"
It is important to understand the placement of the layers. They're drawn in a pixel coordinate fashion. You'll notice that after "draw.text" is two parentheses, one to open the location and definituion of the code that is to be inserted so the system knows what to do with it, and then a second opening parentheses to specify just the coordinants. If you look at the coordinate numbers for each layer or line, you'll see each of the pixel coordinates is slightly off from the others. This was to create a certain aesthetic for the text in question and to make sure that certain parts of the text had an outline so it'd be distinguishable from the background picture.
It is also useful to understand that if you which to fully encapsulate the text in shdaow or underlying outline text, then you need to draw either all four shdaows around the edges of the main text, one above, one below, one to the left and one to the right. Or you can draw in an X fashion rather than a cross fashion. If for whatever reason this doesn't fully encapsulte the text as you will see the font used in this example is more complex and has more sides and edges and markings throughout the text than your average text does, so in this case you can add more layers following this same pattern.
Review the included imagef file with this document to see the example.
For easy copying, use the following example:
draw.text((293, 198),TimeDate.strftime("%I:%M"), font = font_big)
draw.text((299, 210),TimeDate.strftime("%I:%M"), font = font_big)
draw.text((309, 198),TimeDate.strftime("%I:%M"), font = font_big)
draw.text((307, 208),TimeDate.strftime("%I:%M"), font = font_big)
draw.text((294, 208),TimeDate.strftime("%I:%M"), font = font_big)
draw.text((305, 204),TimeDate.strftime("%I:%M"), fill = 'white', font = font_big)
Keep in mind you will have to have variables defining the font type, and size, and where the .ttf (truetypefont) files are located written before these text layers.
Monday 2024-06-16
Doug liked that so much he wanted me to do it again and this time to explain how to use a mask with Python. So here we go again. I don't know if this is a thing that people already did or if somehow Doug just figured out a way to do this. But if you use3 Photoshop and do masking, then you are familiar with this concept. However, we didn't use Photoshop for this. I was going to but then it stopped working on my laptop and I didn't have the time to troubleshoot so he suggested I juts install Paint.net and that would allow me to do a great deal of the things Photoshop allows and would fulfill all of our needs. I was surprised, it even had layers and filters.
This was actually a long journey with complexity and luck. It all started with Doug working on the clock project he just decided to do off the back of my weather display and putting an image in the background. In the process of this Doug got concerned that we should figure out how to save refresh cycles on my e-ink display because the number of refreshes an e-ink display does is what really wears them down. They don't refresh hardly ever unless you're turning the page and stuff like that. So Kindles are really popular and last a while for most people. When we first set the screen up with the Pi-hat from Waveshare for this 7 inch screen, it seemed to refresh like four times or something like that every time you wanted to change the display. That took time and was kind of obnoxious to watch. He figured out how to get it to only refresh twice. Now, there was something about how it had to refresh at least twice because what happens to release any stuck particles in the display, it inverts the image that you are refreshing to and displays it and so that's one refresh and then another to reverse the inversion. It also just happens that if you look at the back of the display between refreshes, you can see that the inverse of whatever is on the front of the screen is visible on the back of it. The particles literally switch places.
However, he kept tinkering because there were all these options that he was trying to figure out how they worked while I was doing other parts of the weather display project, and he kept trying to figure out how to do a partial refresh on the screen instead of a full screen refresh because he thought that would save refresh cycles and I wouldn't have to replace the screen as often. I told him however, that it doesn't matter to me as much. He kept thinking that we need to save refreshes which I liked the idea of, but not by sacrificing things like the clock only updating once every five minutes or something like that. And I also told him if he couldn't figure out the partial refresh thing, it's not the end of the world because ultimately, this isn't very useful or appealing anymore if the one part of the screen that updates all the time is worn out and the rest works just fine. He's like yeah but you wouldn't have to replace the screen as often. I said, I would rather replace the whole screen than worry about moving the time around to different parts of the screen just to get around certain parts being worn out more than others. I want everything on the screen to display properly. This isn't some dystopian movie where they're using old technology or mixed parts to jimmy rig something together to make it work. I would be willing to replace the screen at that point.
He kept working on it and finally cracked the but one day and was really proud of himself. But there was a new problem. You see, he got the screen to do a partial refresh just for the time and nothing else, but this had consequences. This means that the original display since the last full refresh will still be there, it's just covered by a new partial refresh of the image. So every time the clock goes up one minute, lets say it's 10:30, there will be a new image placed over the zero of the minutes in order to display a 1. And then another placed over that one minute later to display a 2. And on and on this goes until ever so often, I have it set to do a full refresh or something. But he was having trouble getting it to display this properly. It sounded to me at the time that he was saying I would have to sacrifice either the partial refresh or the clock itself in his clock display and my weather display as well, or there'd have to be some very unclean, choppy cut and paste like job--but no worry, at least I'd get the partial refresh, the time updating minutely, and everything else would be displayed as desired, there would just be some cosmetic issues.
And then a while later like a week or something like that, he cracked that nut too. And now it refreshes every minute without any cosmetic issues whatsoever, just the minute changes, and apparently, there are hidden layers of previous times going way back to the most recent full refresh. So that was cool that he figured that out. And he was so pleased that this was going to work properly and now I would have this and this and that, and I then said, yeah, but how am I ever going to write about this in the blog? You did it, I didn't have the luxury of watching you do it with constant explanations, and you're not going to explain it to me because that would be too complicated and take forever. And honestly, there are a lot of details he wouldn't remember anyway. Considering my writing style where elaborate on every microscopic detail to the enth-degree in-perpetuity and often never actually make my point.
So I guess that's where these Knowledge Bases come in. We're killing multiple birds with one stone. I haven't been doing my research assignments or my assignments once a week to improve my employment situation other than to work on this project, and I haven't added to my blog in a while because of all the stuff that I would have to explain that I cannot explain, and plus just how incredibly busy I am every single day from sunrise to sunset and far beyond with work and dieting and working out and church stuff and school and assignments and projects and errands, and then really annoyingly, friends! Tss. I mean seriously, who has time for friends! What a waste of my time. Like they just want to sit and do stuff that isn't important. Lol.
So Doug is having me do Knowledge Bases for each aspect of this project in order to get all of those birds killed.
Alright, so that thing where the time keeps updating over itself in partial refreshes, that is essentially the mask. It is just like a mask in Photoshop or something. So when I decided I wanted to add Matric movie Digital Rain code to the display, just to deal with the empty spaces between all the data being shown, I know, yes there is already a background image, but it just seemed strange to me to have information jam packed all over the display but not be able to organize everything in such a way that there is no wasted space to my satisfaction and display this background image. SO I decided to just have stuff displaying on the screen that is totally static--it never changes. The background image occasionally changes, the weather updates ever so often, the time changes every minute, but this one thing doesn't change. Doug thought the display was already way too busy for this. But I was determined to find a way to make it work. I started by trying to figure out how to display text all across the screen.
So we used wrap-around text in the Python code to do this, with a "/n" about every 57 characters to define a new line without actually writing the code on a separate line like code is not meant to do. However long the line needs to be is how long it is in programming, but if you need to insert new lines like it's a document, then this can be a problem for programming so the /n function comes in handy. I forget the terminology that programming uses for this. And so depending on the size of all the characters in the line, to cover the screen with these Matrix Digital Rain characters, it could be more than 587 characters for the screen I am using.
I didn't realize Digital Rain, this whole time, was Japanese written language, I've watched the movies a million times and had no clue. I even had the screensaver on my PC at home for ten years. And apparently, it's called Kanji. I assume the reason they use Kanji for digital rain is because anime is huge in Japan and the Matrix movies were chalk full of things the Wachowski's liked such as kung fu and stuff like that. This is just a guess.
It actually got pretty trying to keep writing random characters 57 or so characters long with a break for a new paragraph using /n and keep getting the wrong lengths because I didn't want the code to be any longer than it had to be to fill the screen, and with the font size I was using it needed a lot of lines. Doug suggested to speed the process up I could just copy a few lines and I told him I would notice. I would know I did it and not stop looking for it until I found the lack of randomness. So then I had the idea to do what he said, but to reuse random lines for the last half of the screen.
Also, it covered the whole screen and made the information displaying for weather and time too hard to see. And then it also rendered the background image pointless. So I experimented with only outlining the screen with Kanji, and that took a lot of extra effort, I didn't want to have this huge and endless line of code with all these broken up spaces in them and asked Doug if there's a way to just tell the program that I want it to insert twenty spaces here and forty five there and it can just simulate that without me having to have forty five spaces in the code. He said not to his knowledge, I would have to figure that out myself. But then he asked why I didn't just create a mask.
What!?
Yeah, do a mask. You remember this! We had to mess around last week with the weather icon images for like cloudy skies showing two clouds next to the temperature and weather condition. Or dropping dots for rain and so on. I wanted the icons to be transparent, so I could just have the outline of the cloud but see the background image behind the icon where the empty cloud space is. So we experimented with that and found that .png is one of few image formats that allow this. .ico is another. That is the format that windows icons actually use. And both of these formats have a unique feature. Say for example you want to have an icon blend seamlessly into the wallpaper of your desktop. Well, I've never seen a Jpeg pull that off without the frame of the image squaring off whatever the image is. So how do icons do this? It's a transparency feature that as far as I am aware, only .png and .ico allows. You have to use a .png to create an image like tis, and then you can use an image conversion website online to convert the .png into a .ico so you can then switch your icons on your computer to that .ico image.
So to my surprise, I already knew this, and learned how to do it one day ten years ago out of boredom and a reluctancy to look for jobs--probably the thing I hate doing most out of everything else. I think I would rather chew broken glass than look for a job! I would rather work a bad job than to look for a good one; and I have!
Anyway, so for the weather icons, and this just kept getting more complicated because of my layering with all the text, I wanted a similar effect with the icons as well. I had the idea to do layers with the cons after we figured out how to make them transparent but Doug was juts like, look, lets just figure out how to make them transparent first and then in Paint.net, you can just create the effect there with layers and then flatten the icons and then place one image for each icon in the program. Okay fine. I created the icons as I wished in paint.net, I saved them as .png's, I turned to Doug and said okay so how did you do that mask thing you were talking about? He wanted to see so I showed him them but I told him there's a problem. You can't just delete the background from the image and save it as a .png for some reason and have that void space. I have done it before but I don't know why it's not working now, and I am not as familiar with Paint.net as I am with Photoshop. So we did it again, deleted the backgrounds from the icons, and this time I didn't save them and close them to my chagrin, and we had to save them as 1 bit so that there would only be black and white pixels because if there is even one shade of gray in the entire image, the display gets all discombobulated and won't work. We went through this a while back. We even had trouble getting an all white image to display when Doug had the idea to simply add one black pixel to the upper left corner that was small enough not to be noticeable and for whatever reason, this allowed the image to work. So now, apparently 32 bit was crucial to make .png display transparency. But the images had to be 1 bit for the display to use them. What gives! We tried saving them as automatic bit rate, saving in the proper folder and updating the image and it still didn't work, and on a hunch, Doug tried saving the images at first as 1 bit with dithering which is crucial for this display, and closing them and then re-opening them and re-deleting the background of the icons again, and then resaving them as 32 bit so we could take advantage of transparency. It worked.

Well, it sort of worked, anyway. The icon displayed properly, just not anything else but the background image. Btw, I took that picture of the Shelby Cobra 427 at Park City like fifteen years ago, and you have no idea how much I wish I had asked the dude to remove his papers for the car from the windshield before I took the pictures of his car. I dealt with that for years and finally got around to photoshopping them out manually and having to create I think it was the passenger side hop bars from scratch to get rid of the eye sore that was those papers. What a pain!
We did get the icon problem sorted out but I don't remember at this point how we did it.
So this is the very last bit of code in the program:
icon = Image.open("resources/icons/clouds.png") # icon weather condition image
img.paste(icon, (3, 75),icon) # the second icon is a mask!
#icon_border = Image.open("resources/icons/border.png") # icon border (temporary)
#img.paste(icon_border, (3, 75),icon_border)
# Write image to the screen
img.save("screen.png")
So icon = image.open is telling the system that anytime you write icon as a command, it'll open the image for the icon to the corresponding weather condition. And in parentheses is the file path to grab the icons from. The icon border is just a thing I created to outline the entire space the icon may take up without having to keep displaying this huge black square in the middle of my display. I wanted to see behind the black box after weeks of programming with a black box there. But we couldn't use the icons themselves because the cloudy icon may not take up the same aera of the available space for the icons that for instance, the sun icon might take. All the icons are shaped differently and take up various amounts of the frame that is invisible to the viewer if the black box wasn't standing in for it. I got tired of it so I created a black outline for the frame so if I needed to move anything, it wouldn't accidentally infringe with the icon images and I would only discover this like a month from now or something. When I was done with it, I commented it out with a hashmark or pound sign so the program would ignore it as programming notes not to be read by the program itself.

And then the next line said to paste the icon and what its pixel coordinates on the screen would be. After the pixel coordinates, you'll notice that icon is written a second time. This is important!
So if you'll notice, the line goes like this "img.paste(icon, (3, 75),icon)", so it pastes the image, says its an icon so the program knows where to get it and what it is, the pixel coordinates, and then it says icon again. Why? Well, this is the mask making its first appearance to my program.
What happens here is python can't do fancy transparency stuff lie .png can. It has a .png that says to do it, but in order for it to display, the program is still automatically going to fill all the space behind the icon with something. You can't put an image there without there being nothing behind it. So my background images would be obscured by this inconvenient image backing that the program automatically puts in there. But there is a workaround. A mask!
What the mask does is when you display it again, it tells the program that whatever space is taken up by that second image, just remove the image from that spot. So you have the image, and then you pate another one over the parts you want to get rid of, and that second iteration becomes a mask which tells the program to erase any pixels in the first iteration that are then taken up by the mask on the display.
So when the wraparound text from the Kanji became an issue, Doug had me create a mask. I went into Paint.net and took one of my display examples, cleared it with all white with the paint bucket and used a brush and the eraser tool to blotch in spaces where I didn't wa t the Kanji to obscure the background image and weather and time information. I wanted to have a dirty look, like the Kanji was there but it was broken up, it didn't come through clearly or whatever, but you could still see that the Kanji was supposed to be there. Doug realized that this was do-able because we were using dithering. We were going to have to dither the image for one reason or another, so instead of dithering for no reason, we were able to use it to create the effect I wanted with opacity changes to the Kanji text.

In case its not obvious, I also created layers for the Kanji text so it'd be noticeable regardless of the overall color of the background image. So whether it's white or grayish or black, you can still see the Kanji.
Thursday 2024-07-11
Fun update, not much work has been done on the Weather Display for several weeks because tests had to be taken and Doug was out several times last week so my troubleshooting didn't go very far. And I recently pulled the screen out to start working on the project again having started a few weeks ago on making the frame that the screen, Pi and hub were going to go in to be hanged on my wall, but Jack knows Blender and offered to make the frame in 3D but doesn't come to class much, and then came in a few times this week to get his attendance back up and helped again with Blender and I quickly reached the point where I had to figure out the light source that will light up my display so I can see it at night but not so bright that it lights up the room and preferably only lights up the display itself. Doug and I were thinking of buying an LED RGB light strip that's three feet long and cut it to seven inches, since the lights are really close together and this strip can be cut between every single light. And then we were discussing where the light would go and had a few ideas I liked but Doug then added that we could put the light strip behind the display since it is transparent. I didn't like this idea but was looking at it and decided to put a flashlight behind it and look at it to see how I felt about it because it would be the best option if it actually worked. And there was a sticker on the back so I tried to pry off the sticker, and then went to grab a disposable wipe at Doug's desk which I thought would be more abrasive without falling apart like a paper towel. And I grabbed the wipe and dropped the screen and it hit the carpet and cracked in two places in the middle of the screen because it is really thin. I tested it and it is definitely a lot cause. I have to buy another one. So it's coming tomorrow and I can't do much with it till then.
Wednesday 2024-07-17
So Doug and I went to work on the weather display again. Everything that needed to be done with the display was basically done, now we just needed to write scripts that would run the python program Doug and I had created several months ago. Doug likes to write separate scripts that run other scripts. He told me since I am still really new at writing scripts, I aught to have ChatGPT do write this separate script, and I could go into detail about what I need from the script. I didn't have a lot of faith in this. I have tried doing this in the past and not had good results on numerous occasions. So I was very skeptical. I was willing to do it but I wasn't jumping right on it because I didn't think it'd work this time either. I thought it would come close but that it would be messy and not actually provide the desired result. Well, I finally did it today.
I told ChatGPT "I need to write an activation script in python3 that will activate a number of other scripts or programs in python, which will start by running a file called "checkWeather.py" in the folder "weather-report" every 30 minutes and then every minute, running a file called "updateTime.py" in the same folder. And I want it to skip running "updateTime.py anytime it runs "checkWeather.py". Also, the "updateTime.py" script needs to run when the time changes, so the display this runs, doesn't show time changes like 30 seconds after the time has changed. The "updateTime.py" script takes 3 seconds to run. And the "checkWeather.py" script takes 15 seconds to run. So the "checkWeather.py" script needs to run at any time when first activated by the activation script, but then it needs to run at the 30 minute mark of every hour and also again at the beginning of every new hour. And it needs to be run 14 seconds before the new hour and 14 seconds before the 30 minute mark. The "updateTime.py" script can be run 2 seconds before the new minute every minute."
I wanted it to run the time update a full second late after the new minute because I didn't want to risk that it starts updating and always updates like four or five seconds after the new minute but I also really didn't want it to update the time from like 5:34PM to 5:34PM because it was still 5:34 when it was set to update the time to the current minute. So I wanted it to finish updating one second late during the new minute each time so that it would officially be 5:35 when the update finalizes and it would show the latest minute instead of the last one every time it updated. I don't know if I am overthinking this but I didn't want to risk that once the time information is fetched and it updates the screen, that it updates it with a time that is now passed. I would rather have it be a second or two off at the new minute than a whole minute off every single time.
It worked rather well. ChatGPT gave me:
from datetime import datetime
scheduler = sched.scheduler(time.time, time.sleep)
subprocess.run(["python3", "weather-report/checkWeather.py"])
subprocess.run(["python3", "weather-report/updateTime.py"])
current_minute = now.minute
current_second = now.second
next_minute = (current_minute + 1) % 60
next_hour = (now.hour + 1) % 24
# Schedule checkWeather.py at the 30 minute mark and at the top of the hour
# Calculate the seconds until the next run
seconds_until_next_check = 14 - current_second
seconds_until_next_check = 60 * (30 - current_minute) + 14 - current_second
scheduler.enter(seconds_until_next_check, 1, run_check_weather)
scheduler.enter(seconds_until_next_check + 1800, 1, run_check_weather) # 30 mins later
# Schedule updateTime.py every minute except when checkWeather.py is scheduled
if i != 0 and i % 30 != 0:
seconds_until_update = 60 * i - 2 - current_second
scheduler.enter(seconds_until_update, 1, run_update_time)
# Schedule next round of tasks
scheduler.enter(3600 - current_minute * 60 - current_second, 1, schedule_tasks)
if __name__ == "__main__":
I was shocked! Doug did look at it and he said that for what I asked it to do, there was a lot of extra code in there that was unnecessary, for instance at the end, it defines main as schedule tasks and then if the name is main then run main when according to Doug, this was completely unnecessary and it also went through a whole thing of creating this elaborate schedule thing which could be majorly simplified and work the same. But he said it should run fine.
We loaded it up, it didn't run, but then we discovered that because I told ChatGPT that the files I want to run were inside this one folder, it wrote the code so that it would always specify that folder in the file path, when the whole time, the script ChatGPT just wrote for me would be in that same folder. I had ChatGPT write it as a relative path rather than a full file path. So when this code ran, it didn't run because the Pi went looking for these two time and weather programs in a folder that didn't exist. The script should have been written so that it was either assumed that the two programs were in the same folder as the script activating them, or a full file path should have been given in the script for both programs so that the Pi would ultimately always start from the home directory and look for the programs in the folder they are located in regardless of what directory or folder tat was being worked from at that time.
Doug quickly changed both of the file paths to the full file path in the activation script. Problem solved. We were both delighted when we were able to watch it update the time every minute only one second late as I requested, and then updated the weather and time and the background image every half hour.
After this, I said it would be nice if I had a button I could press which would tell the Pi to switch from my weather display to Doug's background image and time program which is really cool, has some awesome features which use algorithm's to decide where to put the time based on the contrast of the image in any one of the four corners, so that the time gets placed in the least busiest part of the image and displays as white if its a dark area of the picture or back if it's a bright area of the picture. It's really clean and cool looking and crisp a lot of the time. I don't want to never use it so I asked Doug about using a button and he ultimately said that it could be done but it would require rewriting a lot of what we have already done. A far easier way would be to write yet another over-over-arching script that runs on startup so every time you cut power to the Pi, it automatically runs one of these two scripts and depending on which one ran the last time the Pi was booted, it will instead run the other program. So all I would need to do is unplug it and re-plug it in and around a minute later, the e-ink display would be updated with the other program.
I thought that would be cool but ultimately wanted the button but he sort of shattered by hopes and dreams by talking about re-programing the whole thing just to include a button. Alternatively I could always buy another Pi and screen and Pi hat and have one program on one Pi and the other program on the second Pi. But I'll have to think about that and certainly wouldn't do it right now.
So right before class was over, Doug started working furiously to see if he could get Python to run on startup and did figure out how do to so. But when we programmed it to work and tested it before class was officially over, it didn't work. He said, well that's it for today, we'll try again tomorrow.
Tuesday 2024-07-23
I got set up and thought we were working on getting these programs to run on startup. So I plugged it in and we were talking about the whole CrowdStrike debacle at BYU that he had to work on and he was out of town when it happened so when he got back, these past few days have been rough. And I just happened to look over at my screen and instead of the picture of the Saleen S7 car and 8:59PM displayed on the screen, instead there was a Shelby Mustang GT500 and the time was 6:30PM.
Huh?
Hey Doug, it's working, it ran the over-arching script on startup!
So now we just need to write another over-over-arching script that will switch between the two programs depending on which one ran on the last boot.
To ChatGPT again. I am actually a bit confused about this one because the way I see it, if it is running on startup, this means that the over-over-arching script needs to know what OS is running on it so it can somehow tell it in whatever it is doing to wait, load this please. But it seems like Doug says that's not the case and I don't understand why.
We had to put this on h9old however because at one of the thirty minute marks when the check-weather program I have been working on for a month or two several months ago updates every half hour, we just noticed that it is updating the time thirty seconds late. So Doug and I nano-ed the activation script ChatGPT wrote last Wednesday and we combed over the scheduling code per my specifications and found something interesting. In the code which says when to run checkWeather.py every thirty minutes, and updateTime.py every minute, if you compare what the code says for updateTime.py and what it says for checkWeather.py, it says:
# Schedule checkWeather.py at the 30 minute mark and at the top of the hour
# Calculate the seconds until the next run
seconds_until_next_check = 14 - current_second
seconds_until_next_check = 60 * (30 - current_minute) + 14 - current_second
scheduler.enter(seconds_until_next_check, 1, run_check_weather)
scheduler.enter(seconds_until_next_check + 1800, 1, run_check_weather) # 30 mins later
# Schedule updateTime.py every minute except when checkWeather.py is scheduled
if i != 0 and i % 30 != 0:
seconds_until_update = 60 * i - 2 - current_second
scheduler.enter(seconds_until_update, 1, run_update_time)
"
So if you look closely, you can see that updateTime.py which runs properly says:
"seconds_until_update = 60 * i - 2 - current_second"
And then checkWeather.py by comparrison says:
"seconds_until_next_check = 60 * (30 - current_minute) + 14 - current_second"
Why did ChatGPT tell it to run at the time plus 14 seconds rather than minus 14? So after studying it for a while we changed it to:
"seconds_until_next_check = 60 - 13 - current_second
else:
seconds_until_next_check = 60 * (30 - current_minute) - 13 - current_second"
Both of the red highlighted minus's were plus's and so we changed those. But this wasn't the only change we had to make. We had to nano into checkWeather.py and look for where the program updates the time for every 30 minute and 1 hour mark:
"TimeDate = datetime.now()"
We changed it to:
"TimeDate = datetime.now()+timedelta(seconds=20)"
In python, timedelta is a part of the datetime module and helps calculate the difference between two events. In this case, we want the time to start updating to the next minute 20 seconds before the time changes because despite my attempts in ChatGPT to have it finish updating a second late into the new minute, it was still displaying the previous minute when the activation script ran checkWeather.py.
We put 20 seconds because we wanted it to be greater than the 14 second delay otherwise it might still give us the wrong minute because we tested it after we made the first change in the activation script and what happened was on the new hour mark, it updated the time to the same time five seconds before to the time changed at the new hour, leaving the time outdated, so it didn't update the time right at the 1 hour mark, and then for some reason Doug and I didn't understand, the updateTime.py script then updated the time properly fifteen seconds after the new hour started even though I had specified to ChatGPT to not have it run when checkWeather.py runs. Well, okay, that just answered our question...tss. Because checkWeather.py did not run at the new hour mark because it did it fifteen seconds earlier, the Pi was like, oh, I am supposed to then run updateTime.py. We don't know why it was fifteen seconds late, but the discrepancy with it changing the time at the wrong time was with checkWeather.py and not updateTime.py. imagine that it waited for checkWeather.py to finish r something and then waited a few seconds since updateTime.py also takes some time. Maybe it wasn't fifteen seconds late, maybe it was five or ten. I don't know for sure. because we weren't timing it when this happened.
A couple of funny jokes while we were doing all this, my classmate and friend Jack passed CompTIA Network+ last night so he is sort of done with the program except that there are some details that have to be sorted. And he got one of the highest scores, Doug was trying to remember the highest score any student had gotten on the certification exam and said yeah, 795, (passing is 720 and most people don't get anywhere near that and this was Jack's first try and most people have to take it multiple times and may don't even pass it then. I took it once. Then Doug started going over how everyone in the class was passing this, this and that and that thing over there too, he named like ten students that took various certification exams and how they passed, and then he said we have had a good run lately. And he was like, "When...who failed last?..." And he looked across the classroom at me and said "Christian!" Everyone started laughing.
"Hey wait!"
"He then added, "Well, Christian failed it on purpose so he could buy more time because he wants to keep hounding me for help with projects so that doesn't really count." Tss
Thursday 2024-07-25
I again went to ChatGPT to write what Doug has lovingly named for me the "overOverOverOverarchingScript.py", which is the over, overarching script that will run either runThisToRunEverything.py or runThisToRunEverything2.py, and the former is the script I wrote last week which will run my weather display and the latter is the script that will run Doug's clock program. And whichever was running on the last boot, overOverOverOverarchingScript.py will run the other instead so that every time it boots, it will automatically switch to and activate the other program and the scripts that keep running it every minute.
I went to ChatGPT and wrote "I need a script in python3 on a raspberry pi os called "overOverOverOverarchingScript.py" located the home folder and it's going to activate one file in a folder at home/user/weather-report/. and it's called runThisToRunEverything.py and also another file in folder path home/user/image-display-tools/. and the file is called runThisToRunEverything2.py. And the purpose of the overOverOverOverarchingScript.py which I need written now is that when the Pi boots, it checks which program was running on the last boot, either runThisToRunEverything.py or runThisToRunEverything2.py. And depending on which one was running on last boot, overOverOverOverarchingScript.py will activate the other one instead. So every time the pi boots, it will run the opposite script from the last boot and rebooting will automatically activate the other script."
ChatGPT gave me an output of:
"
import os
import subprocess
# Paths to the scripts
script1 = "/home/user/weather-report/runThisToRunEverything.py"
script2 = "/home/user/image-display-tools/runThisToRunEverything2.py"
# Path to the state file
state_file = "/home/user/last_script.txt"
def read_last_script():
if os.path.exists(state_file):
with open(state_file, 'r') as file:
return file.read().strip()
return None
def write_last_script(script):
with open(state_file, 'w') as file:
file.write(script)
def run_script(script):
subprocess.run(["python3", script])
def main():
last_script = read_last_script()
if last_script == script1:
next_script = script2
else:
next_script = script1
run_script(next_script)
write_last_script(next_script)
if __name__ == "__main__":
main()
"
It also wanted me to create the state file called "last_script":
echo "/home/user/weather-report/runThisToRunEverything.py" > /home/user/last_script.txt
You just paste this line into the cli and run it and it creates the file for you. Then we went to "/etc/systemd/system/weather_report.service" and we edited the file to point to the one we wanted it to read, which in this case is called overOverOverOverarchingScript.py. It was like a text document with the name of the file, then the description, and then one with command to execute when the service is started which is where we put the overarching script.
Then we ran "sudo systemctl daemon-reload" which basically applies changes to services. And then we did "car last_script.txt" which said "/home/user/weather-report/runThisToRunEverything.py", basically telling us that weather-report ran last.
We rebooted to see if it worked and it didn't. So now we have to wait till Monday to figure out why.
Monday - 2024-08-19
Apparently it works fine until it doesn't and then the problem seems to disappear on its own.
This has been Truncat3d 00000000111100010100110______________end of line


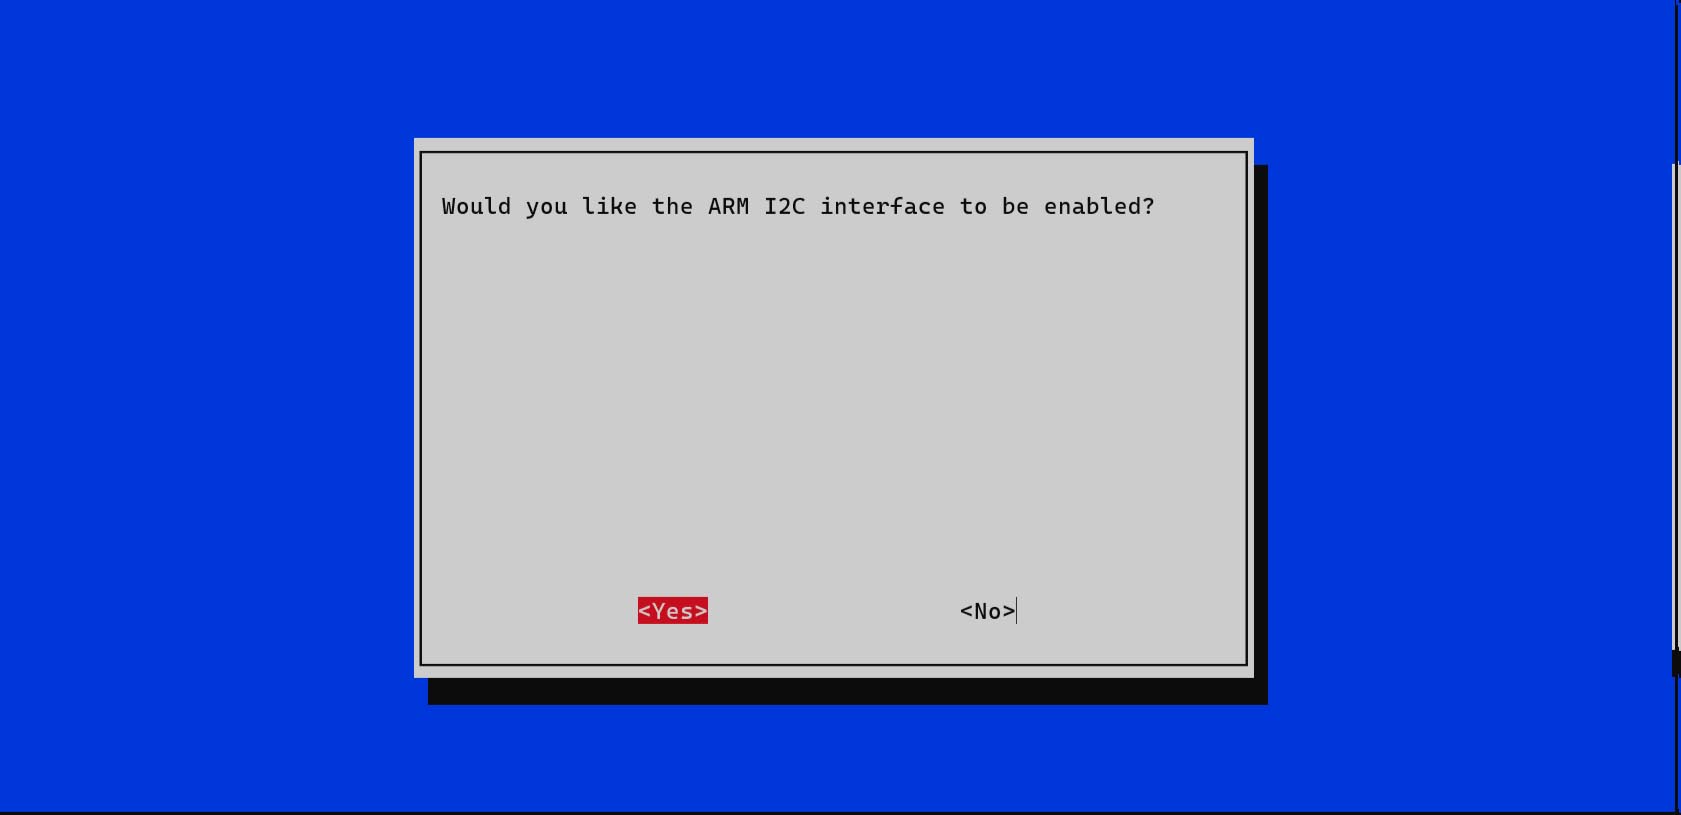


